3/30/16
3/28/16
RT3 MX project
I got started on fitting the $30 Hooker pipe, and taking a look at what to do for a rear fender.
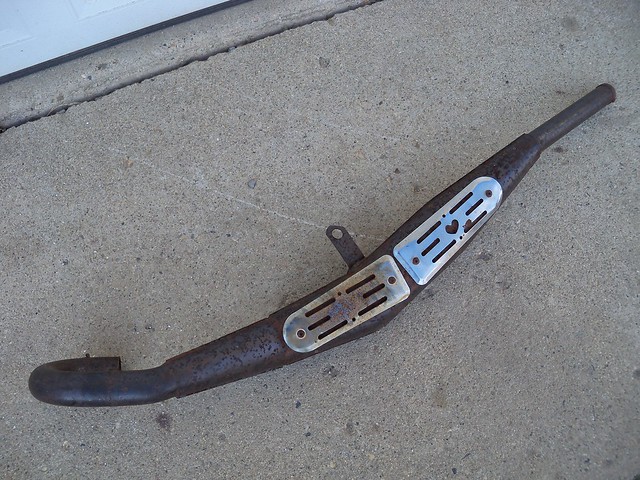
Here is the pipe just set roughly where it will go. I don't know what it is made to fit, but looking at the heat shields it might be for a left side application, but those can be swapped front to back. The head pipe diameter fits the RT3 manifold, although the pipe isn't in the right location.
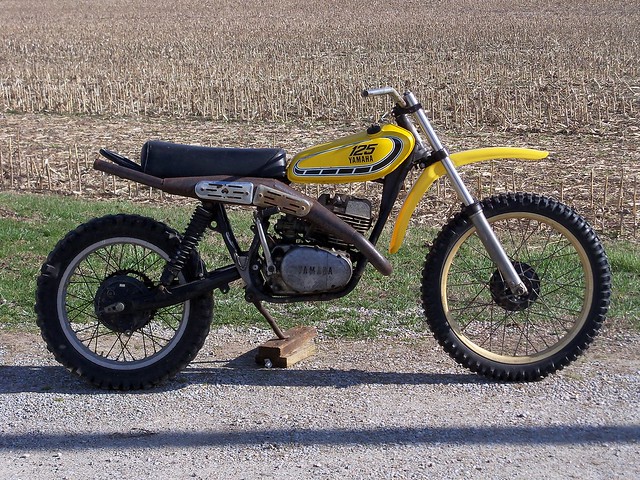
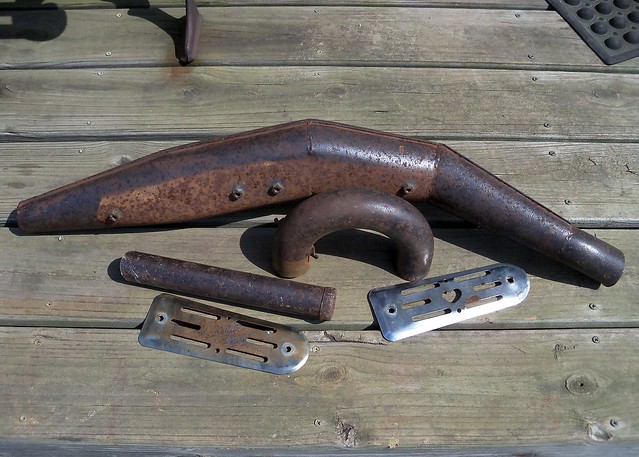
I cut it apart to begin fitting it to the RT. It has surface rust, but is very solid and will look great after sandblasting and painting later on.
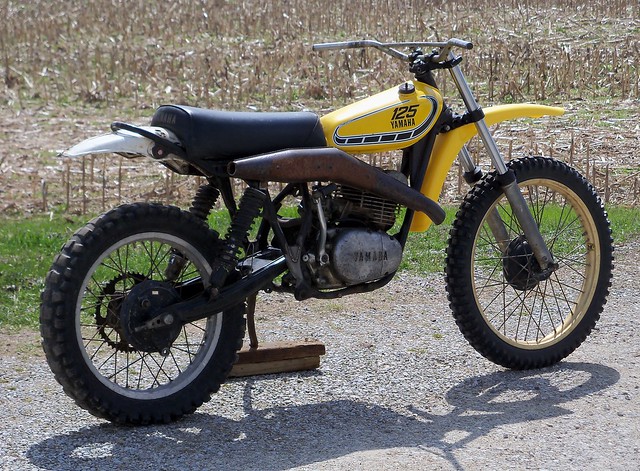
Since I'm using a narrowed XT500 rear frame I thought I'd try a narrowed XT500 rear fender.
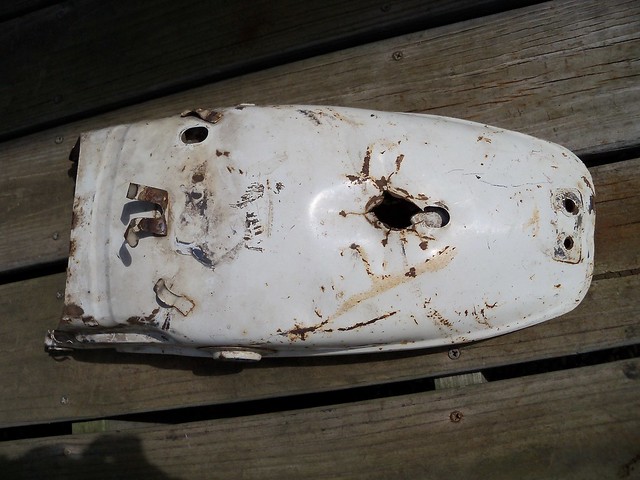
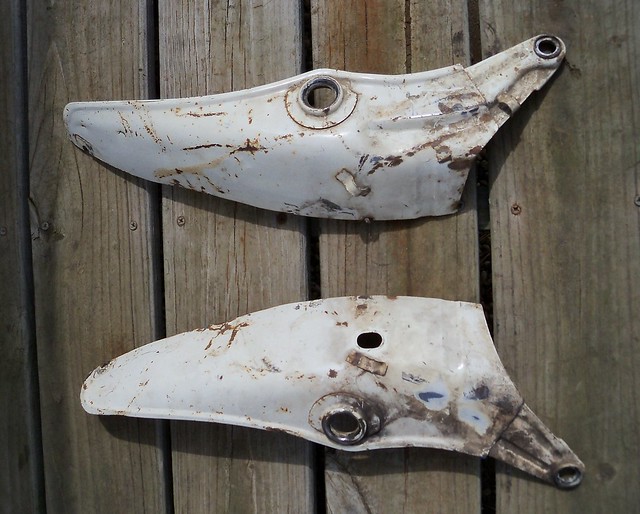
I cut a section out of the middle.
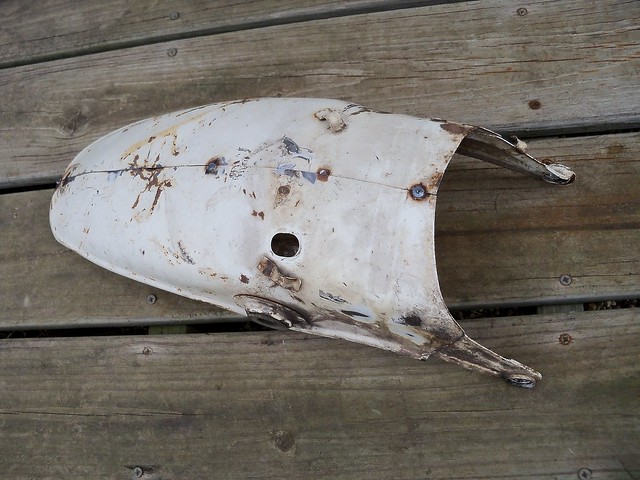
Here it is tacked together. It'll take a bit of metal massaging to make it look pretty, but for now I was just wanting to see if this is what I'll be using.
First I'm figuring out where the expansion chamber needs to live, and then I'll fit the head pipe and weld the stinger on. It's a fat chamber and a skinny bike, so it's a bit of a packaging challenge, but I think this is where it will be. One thing I wanted was to make sure it cleared the kicker pedal. Some aftermarket exhausts don't, and you have to rotate the kicker pedal back. With a 250cc DT this isn't as much of an issue, but on the RT3's 360cc engine not having the full travel on the kick start can cause it to kick back. I'll probably have to make an additional heat shield for the top of the chamber, since it'll be pretty close to the leg there.

I'm really liking the XT500 fender on it, so I'll go ahead and finish it off.

Here is the pipe just set roughly where it will go. I don't know what it is made to fit, but looking at the heat shields it might be for a left side application, but those can be swapped front to back. The head pipe diameter fits the RT3 manifold, although the pipe isn't in the right location.

I cut it apart to begin fitting it to the RT. It has surface rust, but is very solid and will look great after sandblasting and painting later on.

Since I'm using a narrowed XT500 rear frame I thought I'd try a narrowed XT500 rear fender.

I cut a section out of the middle.

Here it is tacked together. It'll take a bit of metal massaging to make it look pretty, but for now I was just wanting to see if this is what I'll be using.

First I'm figuring out where the expansion chamber needs to live, and then I'll fit the head pipe and weld the stinger on. It's a fat chamber and a skinny bike, so it's a bit of a packaging challenge, but I think this is where it will be. One thing I wanted was to make sure it cleared the kicker pedal. Some aftermarket exhausts don't, and you have to rotate the kicker pedal back. With a 250cc DT this isn't as much of an issue, but on the RT3's 360cc engine not having the full travel on the kick start can cause it to kick back. I'll probably have to make an additional heat shield for the top of the chamber, since it'll be pretty close to the leg there.


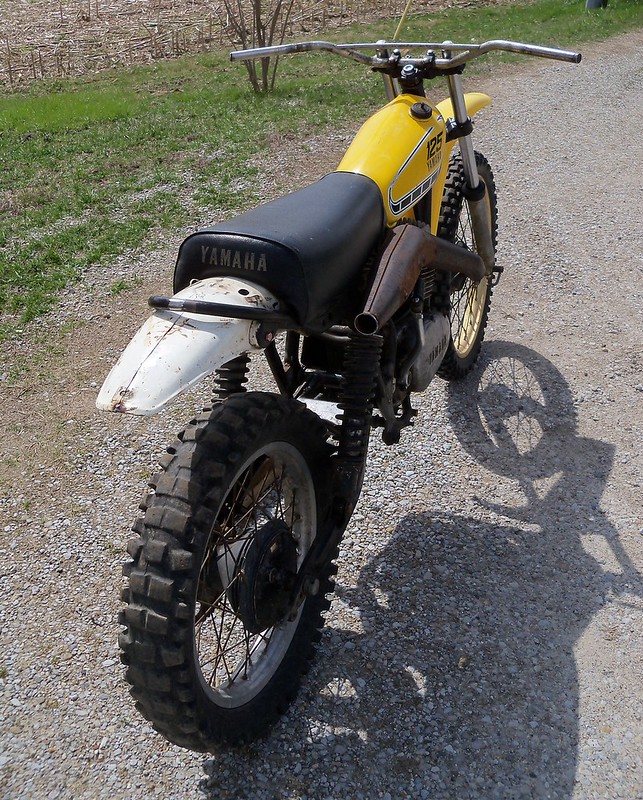
I'm really liking the XT500 fender on it, so I'll go ahead and finish it off.

3/27/16
XS650 enduro project
For the '75 XS650 rear fender I'm doing the same as I use on my '79, which is a shortened stock fender. There are three ways you can shorten it, the first of which is cut off the front of the fender and rotate it forward. With this method you need to make new mounting points. The second way is to cut the rear of the fender, but you lose the factory finished edge. The third way is how I did on the '79, which is to cut out a section in the middle and weld it back together. This keeps the factory mounting points and the finished edge.
First I cut a section out from the middle to get the length I want.
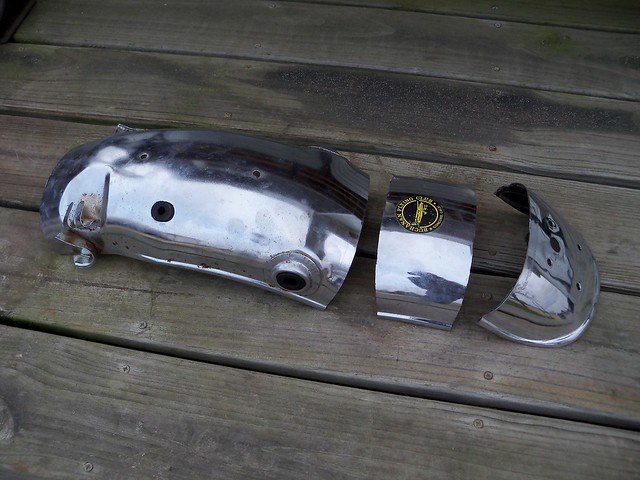
Here is what I want to end up with.
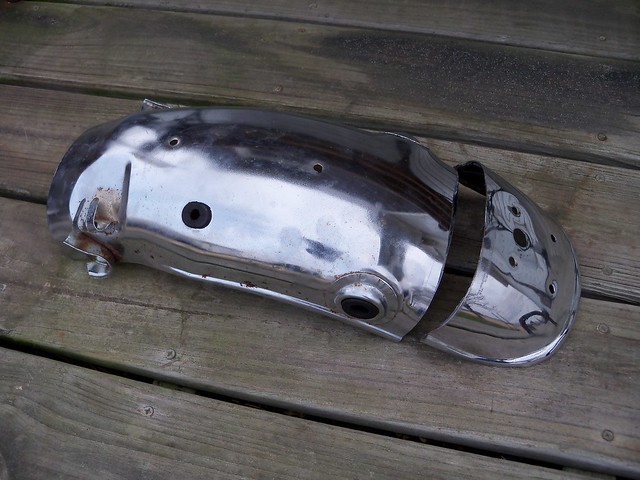
I work the cut edges to get as close a fit as possible, and then sandblast the area to clean it up for welding. The two pieces won't match up perfectly, so I make a cut in each corner to allow for adjustment.
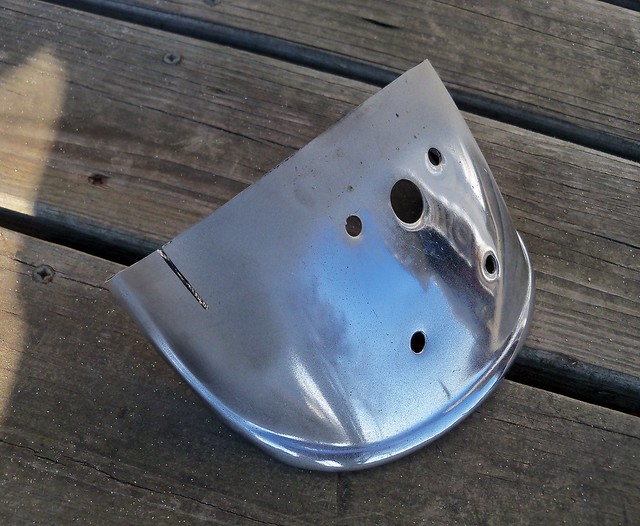
Next is to weld the just the bottom edge on each side.
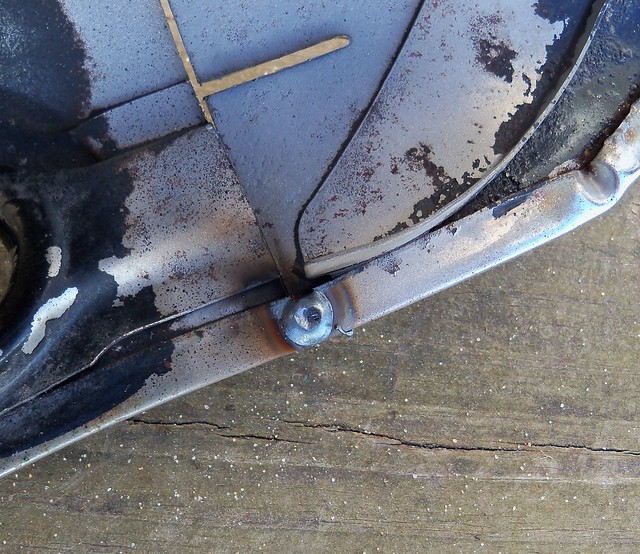
Here it is with just the bottom edges welded together. From this angle it looks like a close fit.
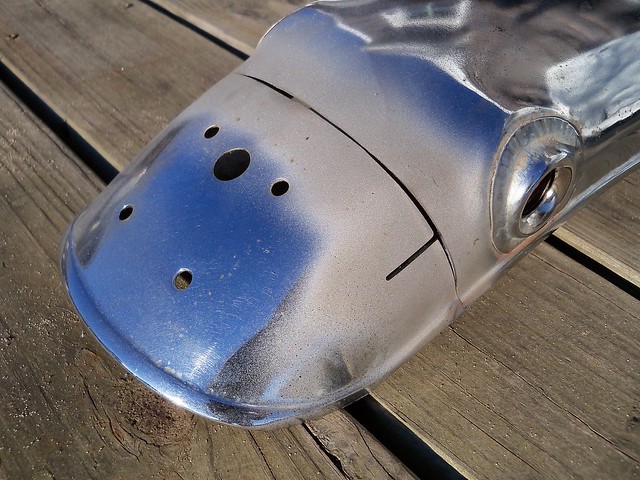
At closer look you can see how far off they are. This is why the cuts are needed.
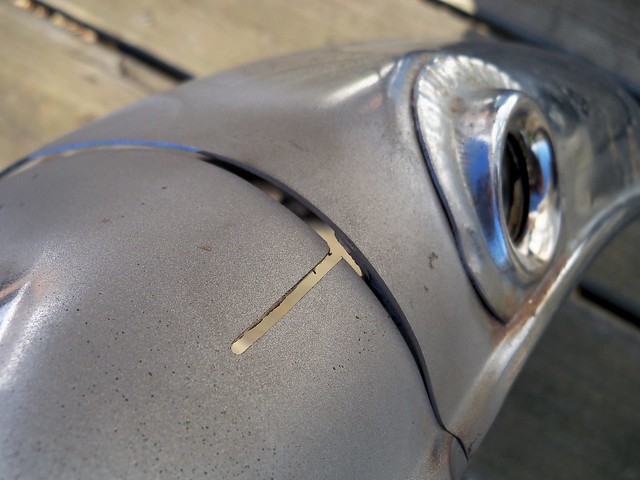
I first start by getting the sides to line up, shown here. The fender is thin, so it doesn't take much effort to bend them in place. Once the sides are in place I tack them from the bottom, and start working the top. The closer you get it, the more time you save when it comes to bodywork.
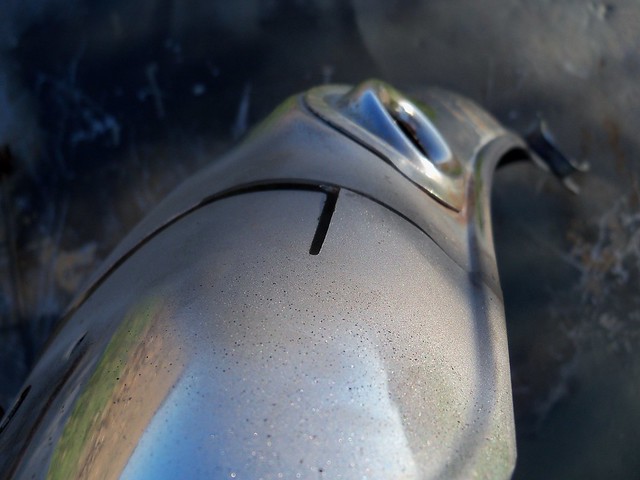
Here the top part is fitted and tacked from the bottom. You can see where the cut opens up allowing the two pieces to fit. Once it is fit and tacked then the rest is welded. Most of the welding is from the bottom, since it won't need any grinding.
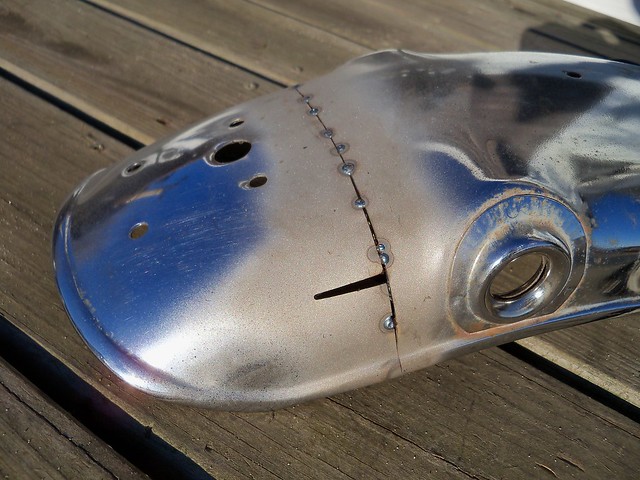
Here it is with the seam ready for bodywork.
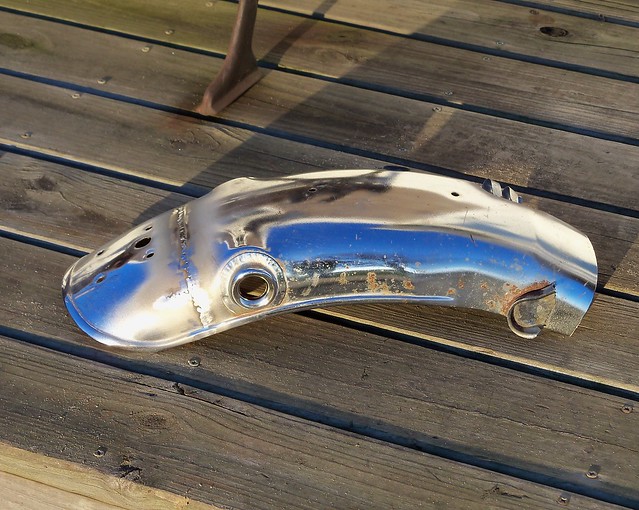
First I cut a section out from the middle to get the length I want.

Here is what I want to end up with.

I work the cut edges to get as close a fit as possible, and then sandblast the area to clean it up for welding. The two pieces won't match up perfectly, so I make a cut in each corner to allow for adjustment.

Next is to weld the just the bottom edge on each side.

Here it is with just the bottom edges welded together. From this angle it looks like a close fit.

At closer look you can see how far off they are. This is why the cuts are needed.

I first start by getting the sides to line up, shown here. The fender is thin, so it doesn't take much effort to bend them in place. Once the sides are in place I tack them from the bottom, and start working the top. The closer you get it, the more time you save when it comes to bodywork.

Here the top part is fitted and tacked from the bottom. You can see where the cut opens up allowing the two pieces to fit. Once it is fit and tacked then the rest is welded. Most of the welding is from the bottom, since it won't need any grinding.

Here it is with the seam ready for bodywork.

3/24/16
XS650 enduro project
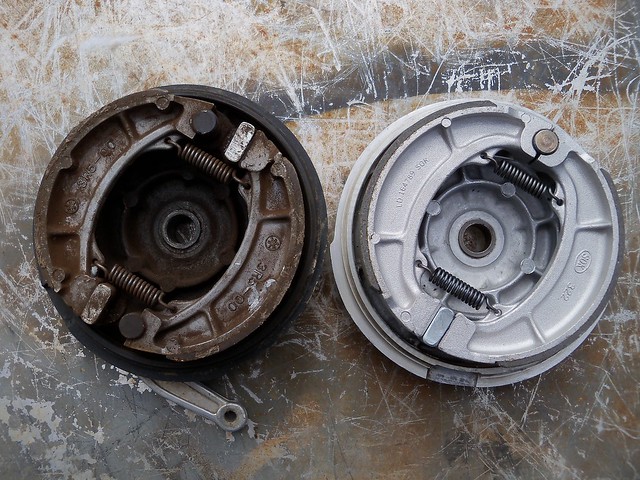
I found a twin leading shoe front brake at the recent swap meet to use on the '75 XS650. Here it is with the SC500 brake I was going to use. There are two different Yamaha TLS brake plates for the small front drums. This one has the fork notch near the top actuator, and the other has it in the middle of the two. This is the one you want to use on the older non-leading axle forks, as the other would have the brake cable coming out forward instead of going up. These usually go for silly high prices on ebay, so I was lucky to get one at the swap meet at a decent price.
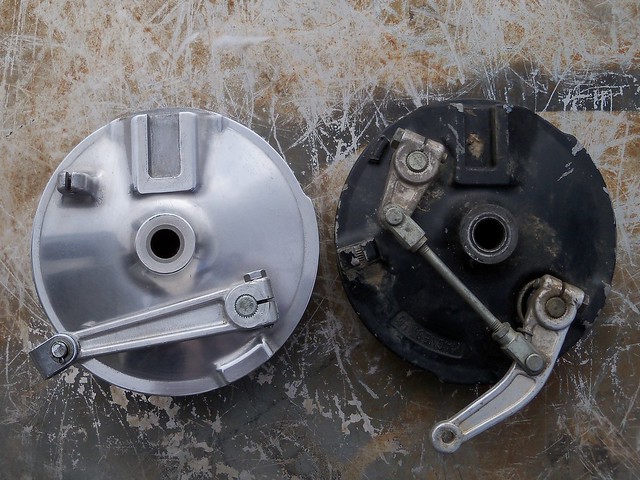
The TLS lifts the leading edge of both shoes, which causes the shoe to be dragged into the drum for increased braking force. The single leading shoe brake lifts the trailing edge of one shoe, making it much less effective. Proper linkage adjustment is critical on the TLS brake, or it might be worse than the SLS.
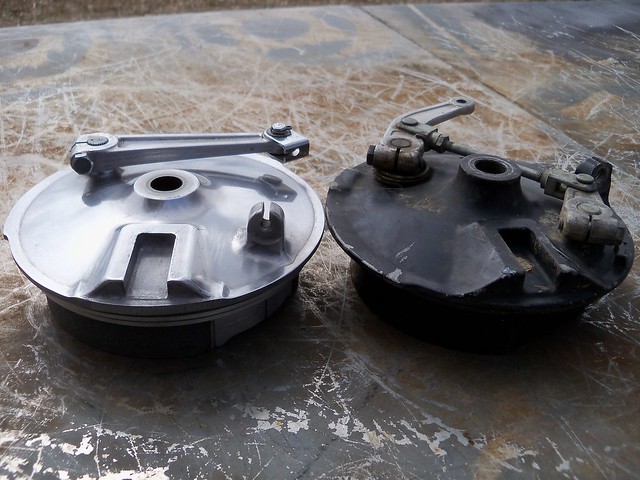
The center part of the TLS plate protrudes about 10mm farther than the SLS, since it was used on the later and wider forks.
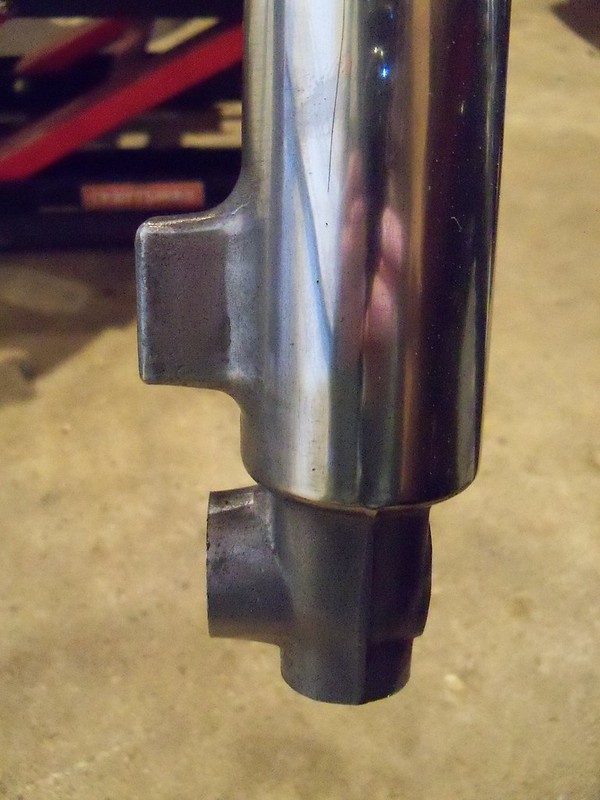
I'm using '78 XT500 forks, and will remove the 10mm from the fork. The TLS brake plate is magnesium, which is flammable, so I'd rather cut the aluminum fork. On older more narrow 34mm forks you'd need to remove the 10mm from the plate.
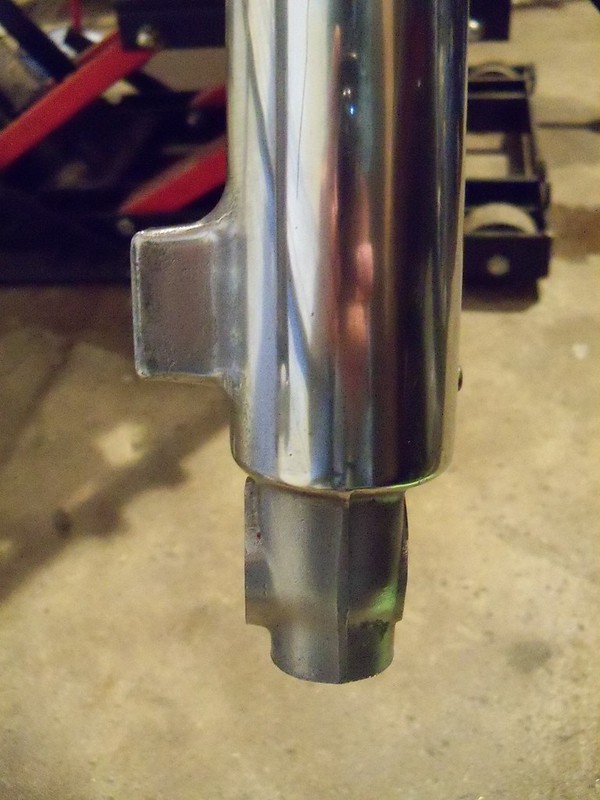
Here it is ready for the new TLS brake plate.
I sand blasted the TLS plate, and painted it with Dupli-Color self etching primer and aluminum caliper paint. Magnesium can be very prone to corrosion, so I painted the back side also. I then cleaned up the linkage and installed new EBC shoes.
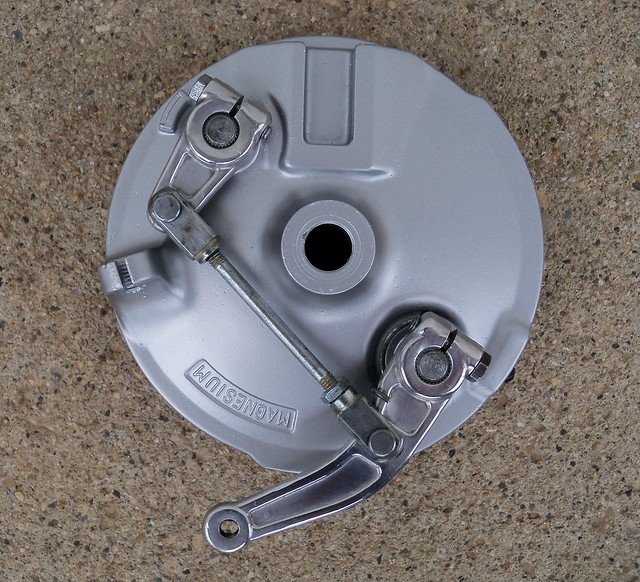
Here it is on the bike.
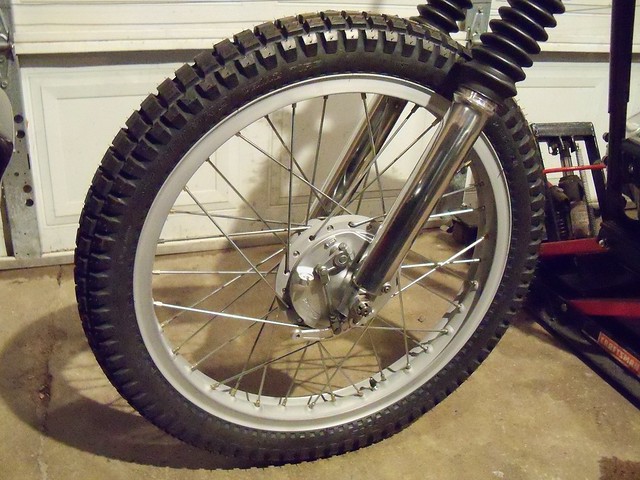

The TLS lifts the leading edge of both shoes, which causes the shoe to be dragged into the drum for increased braking force. The single leading shoe brake lifts the trailing edge of one shoe, making it much less effective. Proper linkage adjustment is critical on the TLS brake, or it might be worse than the SLS.

The center part of the TLS plate protrudes about 10mm farther than the SLS, since it was used on the later and wider forks.

I'm using '78 XT500 forks, and will remove the 10mm from the fork. The TLS brake plate is magnesium, which is flammable, so I'd rather cut the aluminum fork. On older more narrow 34mm forks you'd need to remove the 10mm from the plate.

Here it is ready for the new TLS brake plate.

I sand blasted the TLS plate, and painted it with Dupli-Color self etching primer and aluminum caliper paint. Magnesium can be very prone to corrosion, so I painted the back side also. I then cleaned up the linkage and installed new EBC shoes.

Here it is on the bike.

3/23/16
RT3 MX project
I found most of what I was looking for at the swap meet, so did some more mock-up on the RT3. I bought a rolling '78 DT250 chassis for $35 for the forks and rear wheel. I got a '73-'74 MX250 seat, a DC Plastics early YZ reproduction front fender, and a Hooker expansion chamber. I had some leading axle 38mm forks on it, but they weren't right for this bike. The 34mm DT250 forks are just right using '73-'74 SC500 triple clamps. The MX250 seat should work fine after some minor alterations.
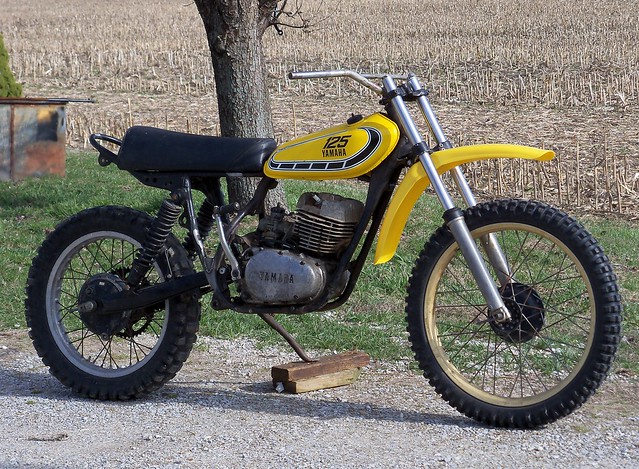
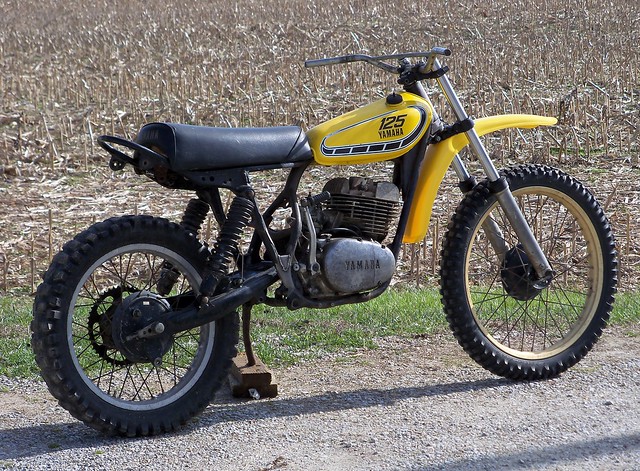
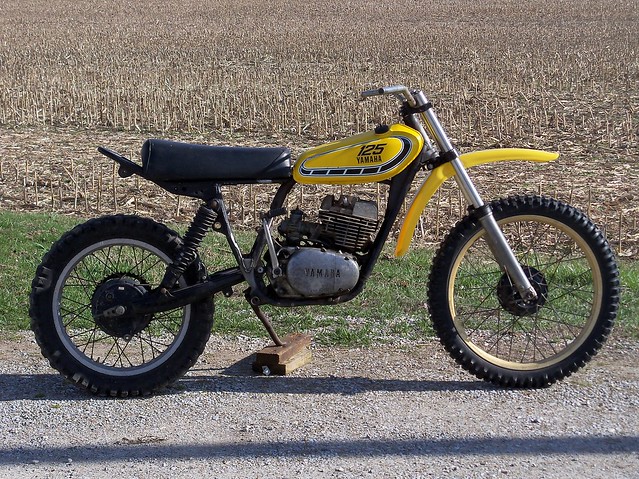
Before getting too far along I wanted to see if there were any clearance issues at full travel. I've been using 13.5" XT500 shocks for mock-up, and had some bare shock bodies without springs, so I put those on and removed the fork caps. No rubs or clearance problems.
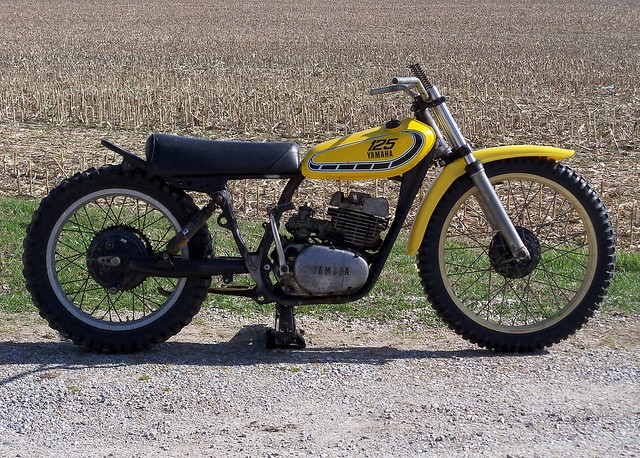
I have no idea what the Hooker pipe was made to fit, but looks like I should be able to make it fit the RT3.


Before getting too far along I wanted to see if there were any clearance issues at full travel. I've been using 13.5" XT500 shocks for mock-up, and had some bare shock bodies without springs, so I put those on and removed the fork caps. No rubs or clearance problems.

I have no idea what the Hooker pipe was made to fit, but looks like I should be able to make it fit the RT3.

3/20/16
3/17/16
Preston Petty
Preston Petty has been going through some health issues, and a support fund has been set up to help. For more information go to: https://www.gofundme.com/jvu3uaw4
3/12/16
3/9/16
Subscribe to:
Comments (Atom)
