10/31/11
10/29/11

old bikes and old tires
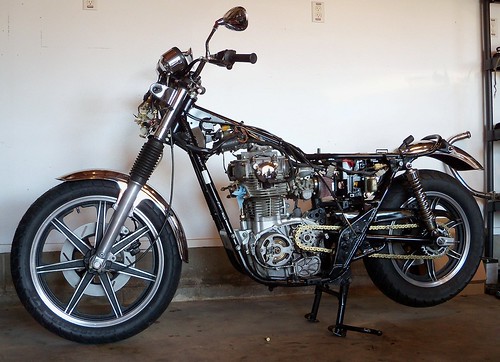
I got more work done on the XS650 this week, and might have it ready to ride tomorrow.
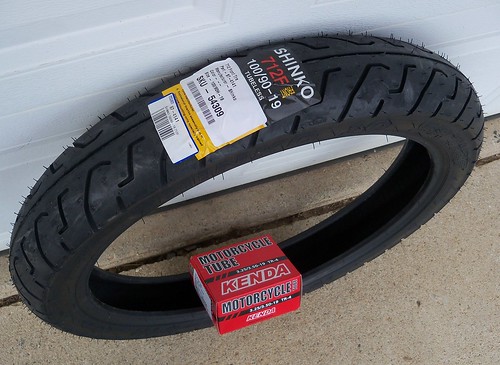
Here are the wheels and Shinko SR712 tires all set to go. I bought a new front, but I'm using the rear tire that came on the bike. With all of the older bikes being put on the road I thought I'd go over a few tire basics, like determining if the tires are good or need replaced. This bike only has about 12,000 miles on it, and being 32 years old has obviously spent some time sitting, so typical of what you find with an old bike.
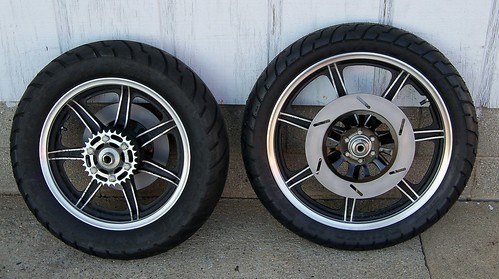
Here's the rear that came on the bike, which was obviously much newer than the front. No cracking, soft and flexible rubber, and no flat spotting in the center. Looks good.
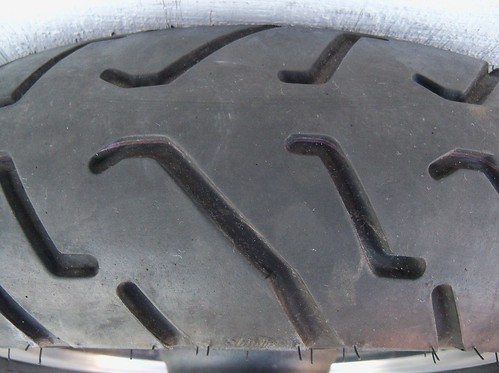
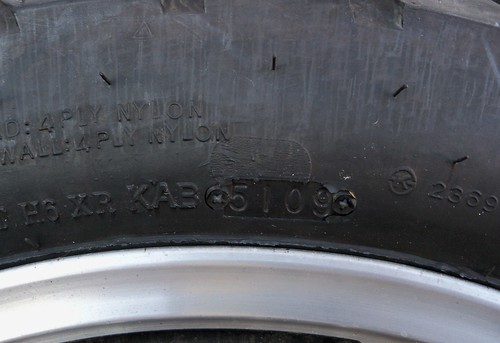
Looking at the date code "5109" shows that it was manufactured in 51rst week of 2009. So, this tire was likely installed in early 2010, so nearly a new tire. All good here, with plenty of years and miles to go.
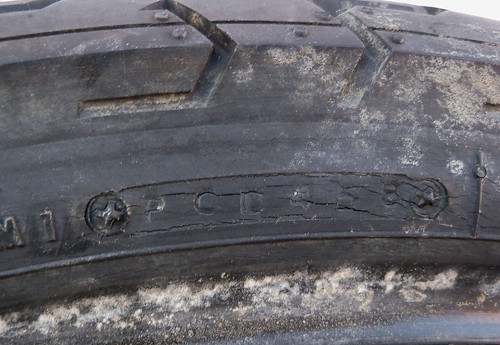
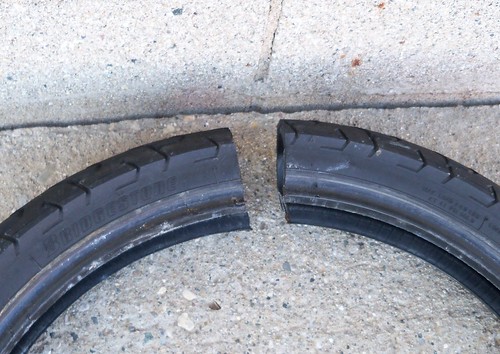
Below is the front which was in really bad shape. It has a 3 digit date code "458". Before 2000 3 digits were used, meaning the tire was made in the 45th week of a year ending in 8. Tires from the 90s will usually have a triangle at the end, so going by this, the tire was made in 1988, 23 years ago. Bad. I don't use a set expiration date, most tires are in their prime for 5 years or so, and deteriorate from there, but by now anything that has the older 3 digit code should be suspect.
This picture below reminds me of those you see on a Craigslist ad showing how good the tires are. I'd guess that when a previous owner got the bike back on the road and replaced the rear, they probably looked at the tread left in the front and thought it looked fine. It doesn't look too bad at first glance, but it feels like plastic, and you can't indent it with a finger nail.
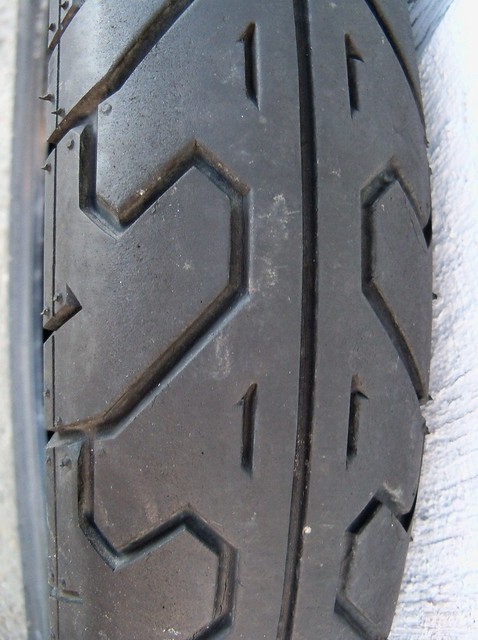
And look at this spot. This is on the left side, so likely where the bike sat for years on the side stand, maybe a concrete garage floor drying the tire like a sponge.

Before dismounting from the rim, I let this tire sit in the sun to warm, but it was still so hard I choose to do the reciprocating saw removal method. Just cut through the tire, and use a tire iron to lift the bead up to cut.
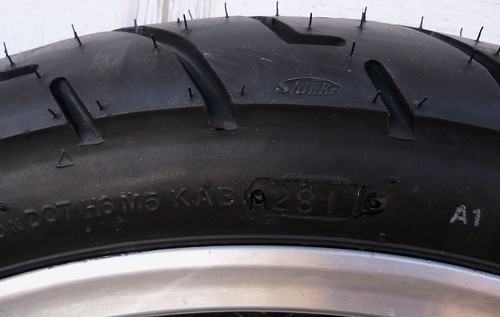
The new front from the Motorcycle Superstore, with a "2811" code, so made in the 28th week of 2011. Less than $60 for a new tire and tube, money well spent.
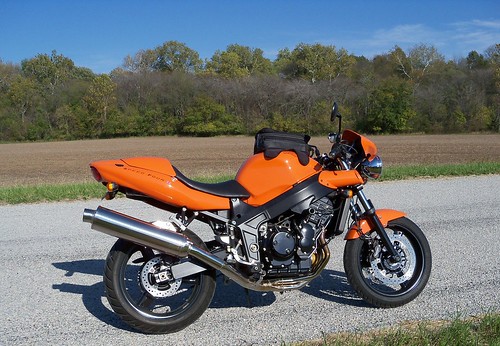
Good rubber makes a bike so much more fun to ride, and safer also.
Here are the wheels and Shinko SR712 tires all set to go. I bought a new front, but I'm using the rear tire that came on the bike. With all of the older bikes being put on the road I thought I'd go over a few tire basics, like determining if the tires are good or need replaced. This bike only has about 12,000 miles on it, and being 32 years old has obviously spent some time sitting, so typical of what you find with an old bike.
Here's the rear that came on the bike, which was obviously much newer than the front. No cracking, soft and flexible rubber, and no flat spotting in the center. Looks good.
Looking at the date code "5109" shows that it was manufactured in 51rst week of 2009. So, this tire was likely installed in early 2010, so nearly a new tire. All good here, with plenty of years and miles to go.
Below is the front which was in really bad shape. It has a 3 digit date code "458". Before 2000 3 digits were used, meaning the tire was made in the 45th week of a year ending in 8. Tires from the 90s will usually have a triangle at the end, so going by this, the tire was made in 1988, 23 years ago. Bad. I don't use a set expiration date, most tires are in their prime for 5 years or so, and deteriorate from there, but by now anything that has the older 3 digit code should be suspect.
This picture below reminds me of those you see on a Craigslist ad showing how good the tires are. I'd guess that when a previous owner got the bike back on the road and replaced the rear, they probably looked at the tread left in the front and thought it looked fine. It doesn't look too bad at first glance, but it feels like plastic, and you can't indent it with a finger nail.
And look at this spot. This is on the left side, so likely where the bike sat for years on the side stand, maybe a concrete garage floor drying the tire like a sponge.
Before dismounting from the rim, I let this tire sit in the sun to warm, but it was still so hard I choose to do the reciprocating saw removal method. Just cut through the tire, and use a tire iron to lift the bead up to cut.
The new front from the Motorcycle Superstore, with a "2811" code, so made in the 28th week of 2011. Less than $60 for a new tire and tube, money well spent.
Good rubber makes a bike so much more fun to ride, and safer also.
10/28/11
10/25/11

10/23/11

10/22/11

progress
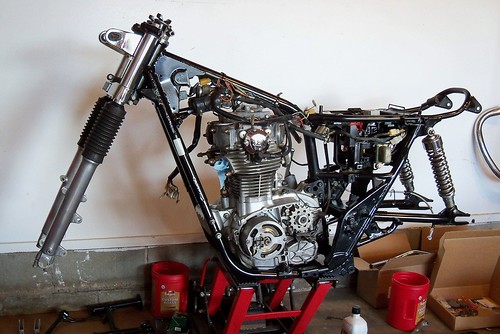
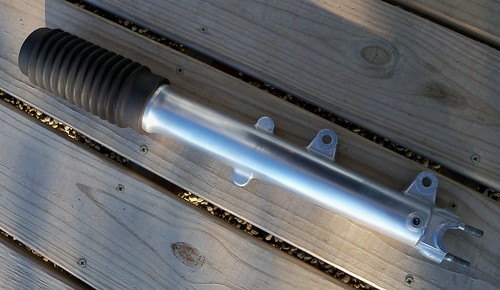
I got some work done on the XS650 stocker this week, and hope to have it rolling soon. The TC Bros. Choppers swing arm bushings were a perfect fit, and also the All Balls tapered steering bearings.
One problem, the dust seals that came with the fork seals in the All Balls kit didn't fit right.
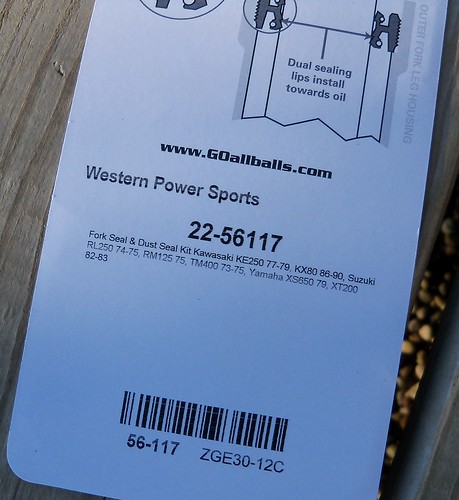
They are too short.
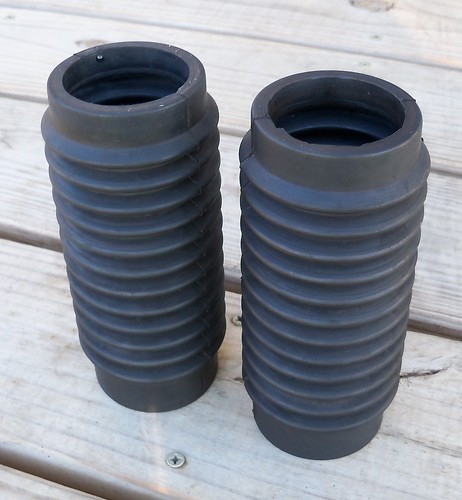
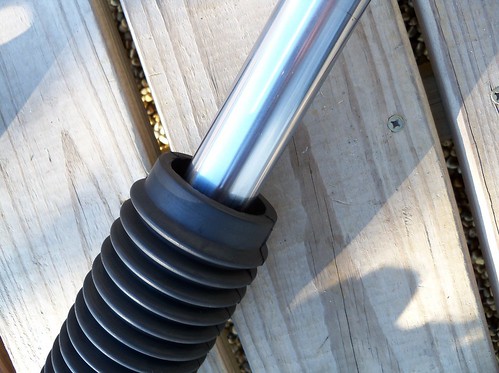
I'd thought about using gaiters, so decided to fit some for a '69-'70 Triumph Bonneville.
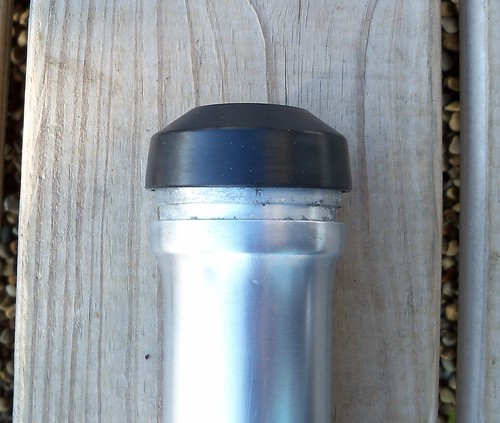
The end that goes to the top on the Triumph has a lip...
...that is a perfect fit on the Yamaha lower.
The other end doesn't fit the tubes. There are a few ways to remedy this, but I decided to use the All Balls dust seals.
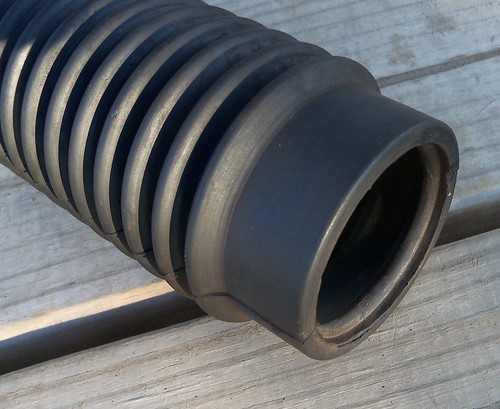
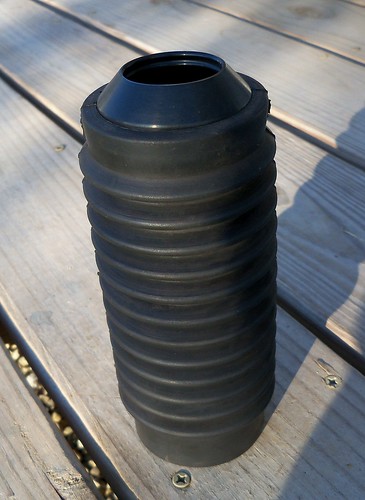
They have an OD slightly bigger than the ID of the gaiters.
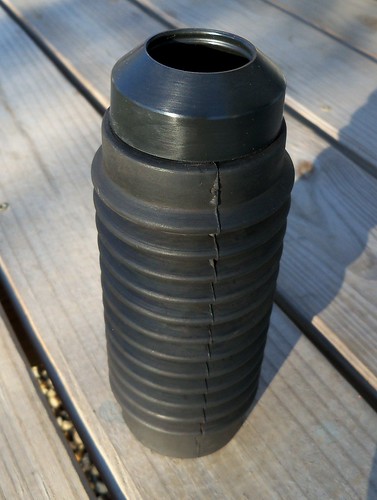
So, fold them in a C shape and pop them in and unfold. It is a tight interference fit, but I also glued them in place. It should work alright, and does look nice. If is doesn't work, I'll make some rubber bushings and use a hose clamp or zip tie. I also added vent holes in the bottom side on the lowest bellow in the back, so they won't be affected by pressure from fork movement.
One problem, the dust seals that came with the fork seals in the All Balls kit didn't fit right.
They are too short.
I'd thought about using gaiters, so decided to fit some for a '69-'70 Triumph Bonneville.
The end that goes to the top on the Triumph has a lip...
...that is a perfect fit on the Yamaha lower.
The other end doesn't fit the tubes. There are a few ways to remedy this, but I decided to use the All Balls dust seals.
They have an OD slightly bigger than the ID of the gaiters.
So, fold them in a C shape and pop them in and unfold. It is a tight interference fit, but I also glued them in place. It should work alright, and does look nice. If is doesn't work, I'll make some rubber bushings and use a hose clamp or zip tie. I also added vent holes in the bottom side on the lowest bellow in the back, so they won't be affected by pressure from fork movement.


10/14/11
parts for the XS650
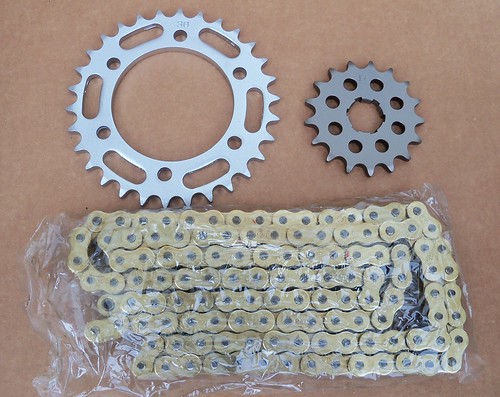
Parts for the '79 Special have been arriving this week. Here are some of what will be going on it. The bike came with a new Shinko SR712 on the rear and a rock hard and cracked Bridgestone on the front, so I got a new SR712 to match the rear. I ordered it from Motorcycle Superstore on Saturday and got it Tuesday, so very quick service. I also got a new tube. The front rim looks identical to my '80 SR500, which doesn't use tubes. The SR has "suitable for tubeless tires" stamped onto it, and the '79 XS rim doesn't. I think the stamp is the only difference, as I don't recall the tubeless SR rim having any "safety lip" I'll just run a tube to be on the safe side.
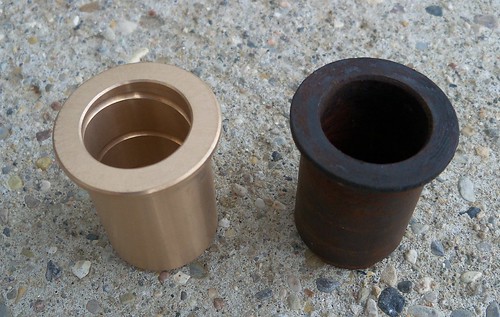
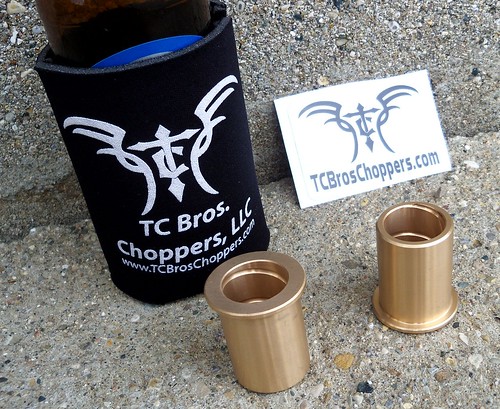
The bronze swing arm bushings are from TC Bros. Choppers. They'll be a nice handling improvement over the stock plastic bushings for sure.
Free beer coozy is a nice touch also!
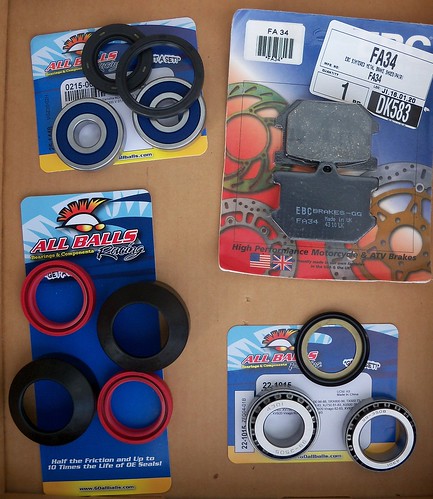
Up front, EBC brake pads and All Balls fork seals and dust wipers, tapered steering bearings, and wheel bearings. The nice thing about All Balls bearings kits is that they include new seals.
Of course lots of stuff from Mikes XS. I got clutch and throttle cables for the standard XS650, which will fit better than the long Special model cables, since I'm using lower bars.
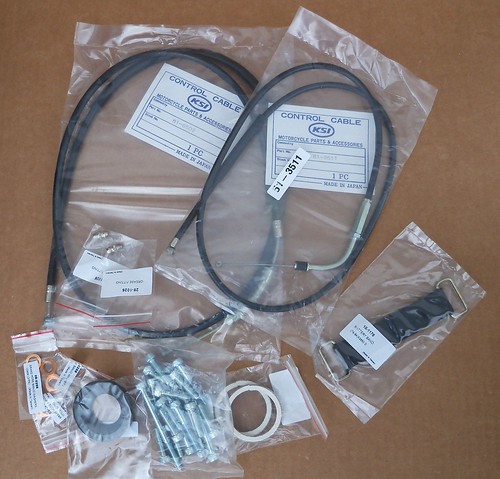
The rear brake line was pretty ugly looking, so I got a braided line from Mikes XS. The bike came with a new braided two piece line on the front. The top line is a bit long with the lower bars, but I think I'll be able to route it to take up the extra length.

I'm going from the stock 17/34 sprocket ratio to 17/30. With the stock gearing the bike was really screaming at 70 mph+, so this should help it out.
The bronze swing arm bushings are from TC Bros. Choppers. They'll be a nice handling improvement over the stock plastic bushings for sure.
Free beer coozy is a nice touch also!
Up front, EBC brake pads and All Balls fork seals and dust wipers, tapered steering bearings, and wheel bearings. The nice thing about All Balls bearings kits is that they include new seals.
Of course lots of stuff from Mikes XS. I got clutch and throttle cables for the standard XS650, which will fit better than the long Special model cables, since I'm using lower bars.
The rear brake line was pretty ugly looking, so I got a braided line from Mikes XS. The bike came with a new braided two piece line on the front. The top line is a bit long with the lower bars, but I think I'll be able to route it to take up the extra length.
I'm going from the stock 17/34 sprocket ratio to 17/30. With the stock gearing the bike was really screaming at 70 mph+, so this should help it out.
10/11/11
fork leg clean up
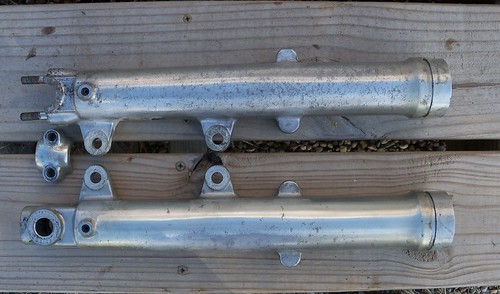
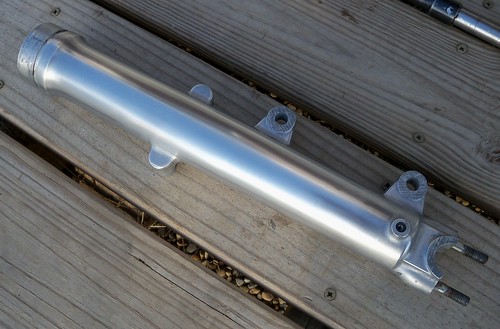
I got the parts ordered for the '79 XS650, so doing some prep work before they get here. One of the things I'm doing is a fork rebuild, and wanted to clean up the fork lowers, not doing a full on polish job, but just to get a nice clean look. I thought I'd start with the worst one, the left side on the top in the picture.
First thing was wet sanding with soapy water, using both 320 grit paper and also Scotch-Brite heavy duty scour pads. I also cleaned the inside at this point. The very top is covered by the dust wipers, so no need to be too concerned there.
Next is to buff it out using a Scotch-Brite non-scratch stove top scour pad and Meguiars car wax. This gives it that just right sheen and keeps the aluminum looking nice for a long time.

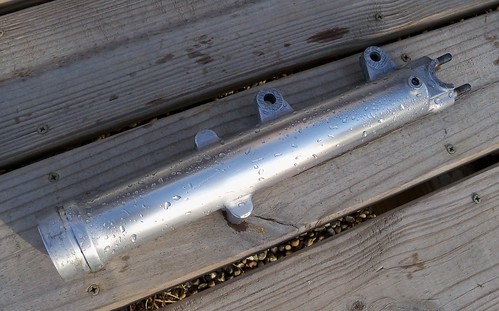
Then wipe off the wax with a dry paper towel, afterward rinse it off and clean off any remaining wax with another towel and dry it off. This is it before drying, and you can see how the water beads.
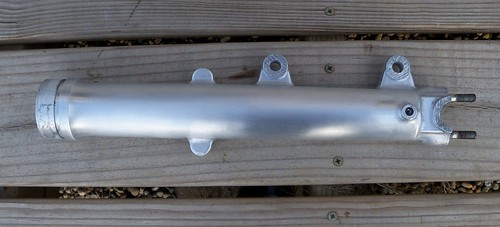
The finished part, looking great for not a lot of work.
First thing was wet sanding with soapy water, using both 320 grit paper and also Scotch-Brite heavy duty scour pads. I also cleaned the inside at this point. The very top is covered by the dust wipers, so no need to be too concerned there.
Next is to buff it out using a Scotch-Brite non-scratch stove top scour pad and Meguiars car wax. This gives it that just right sheen and keeps the aluminum looking nice for a long time.
Then wipe off the wax with a dry paper towel, afterward rinse it off and clean off any remaining wax with another towel and dry it off. This is it before drying, and you can see how the water beads.
The finished part, looking great for not a lot of work.
10/10/11


Subscribe to:
Comments (Atom)