3/30/14

DT1 flat track project

I bought some Red Wing shocks from ebay seller Vintage Motorcycle Parts Warehouse. I did have to make two of the metal bushing sleeves, since two that came with the shocks were too large in diameter for the DT.
100_5872

I went with the 330mm shocks.
100_5875

They aren't the greatest, but fit the budget. Compared to a stock DT shock the rod is larger in diameter, and they look like they have less travel, but should be enough for a flat tracker.
100_5882

I've been detailing everything going on the bike, the brake pivot here.
100_5885

To clean a part like this, I take it apart and clean it using hand cleaner and a small brass brush.
100_5888

I got a compression release for the bike. This is used for engine braking.
100_5893

It has a handlebar mounted lever, and a part that goes into the extra spark plug hole.
100_5896

It's coming together.
100_5926

100_5924

today

I played around on the TY today, just getting an idea of what work will need done on it.
100_5929

100_5936

I really like the aluminum tank.
100_5947

The forks and front wheel aren't original, but work good on the bike. I think they might be from a Penton.
100_5946

It is missing the exhaust baffle, so is ear splitting loud. The exhaust shouldn't be kicked up at the rear either.
100_5948

I'll probably make an aluminum heat shield to replace the missing one.
100_5943

3/23/14

DT1 flat track project

I've started assembling the DT1 flat tracker. The shocks are the thermal flows I had on it in mock-up, but I'll likely get a NOS set of Red Wings for it instead. A quick review of what's going on here:
frame- 1968 DT1 with some tabs removed and later style front tank mounts added
swingarm- 1968 DT1 detabbed and stretched 1.5"
engine- 1973 DT3 with Boyesen reeds, Wiseco 71mm piston, ported cylinder, and converted to run pre-mix
rear wheel- 1973 SC500
front wheel- 1973 TX650
fork- 1973 TX650 34mm shaved and lowered 1.5" in early MX aluminum clamps
rims- MikesXS shouldered aluminum
tires- Duro HF308
100_5826

100_5835

100_5834

100_5855

The bars are 'Euro' bend handlebars.
100_5859

I had a '72-'73 style tank and seat on the bike for mock-up, but I think it needs the earlier set, so picked some up to use. The seat looks terrible, but has a nice pan which is all I need from it.
100_5849

3/15/14

XT500 MX project

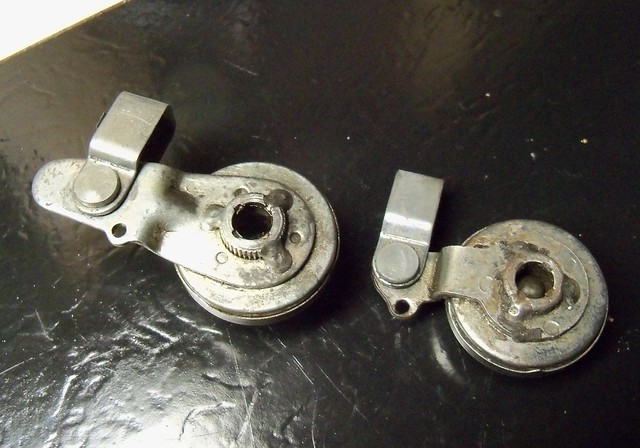
I'm just starting on this project, but already have made a change. A 1980 Suzuki PE250 aluminum swingarm will be used instead of the 1977 RM250 steel part. It was $50 'buy it now' with free shipping on ebay, so too good of a deal to pass up. This one isn't cracked at the pivot like many of them are, and came with the chain guides.
100_5754

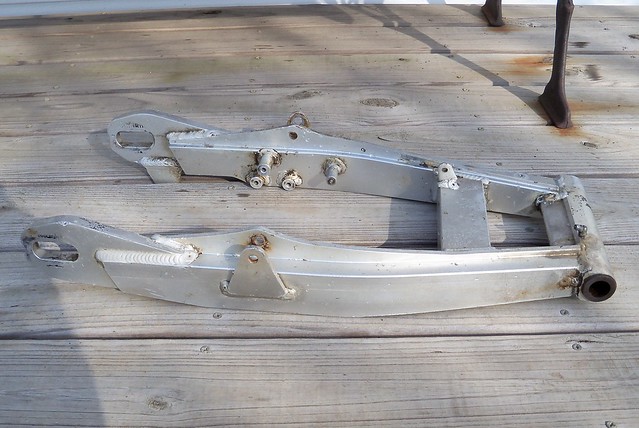
The PE250 swingarm is wider at the pivot. Where the RM swingarm is narrower than the XT part, the PE swingarm is about the right width, if anything maybe a bit too wide. I believe the '78-'79 PE swingarms are steel, and the '80-'81 are aluminum. The '78-'80 RM swingarms are aluminum.
100_5763

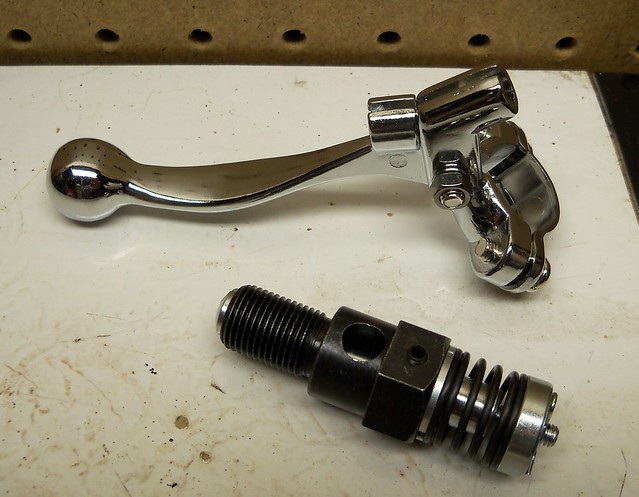
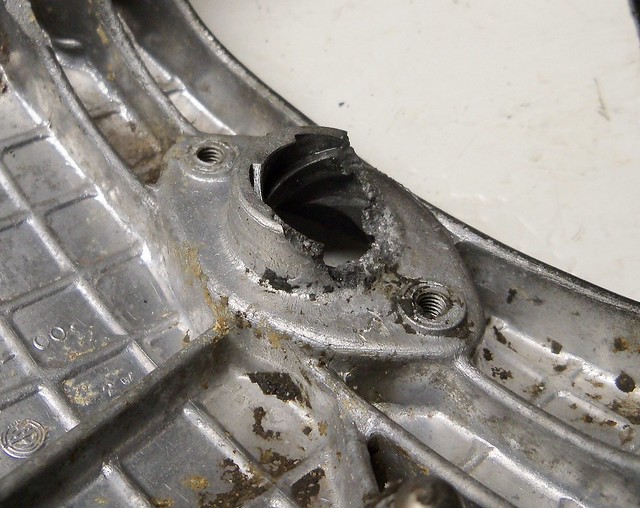
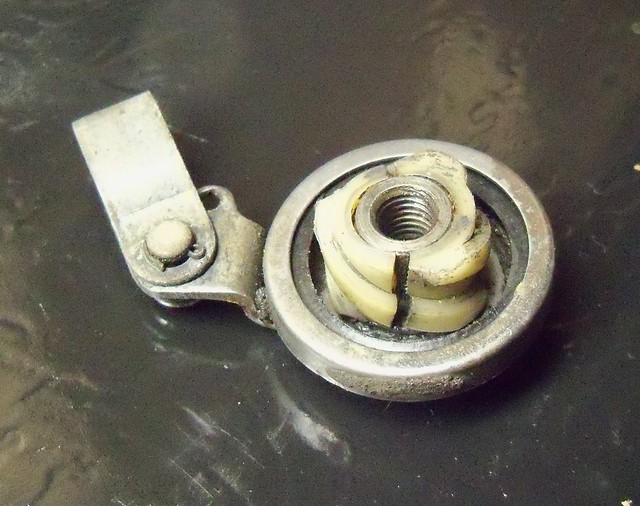
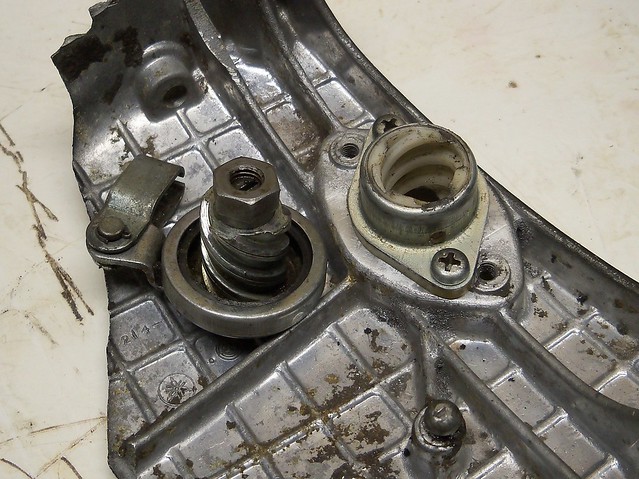
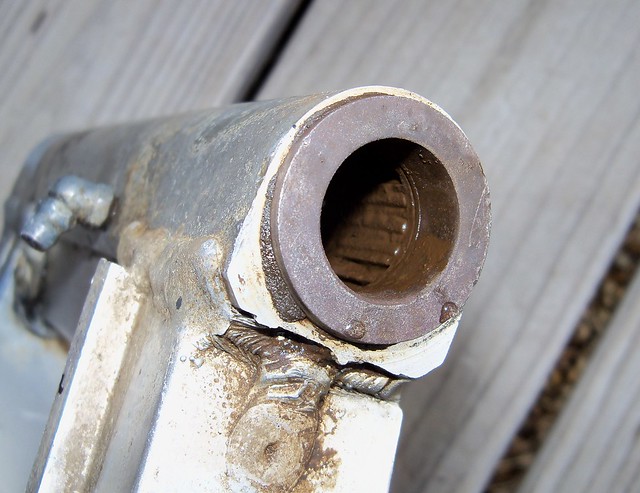
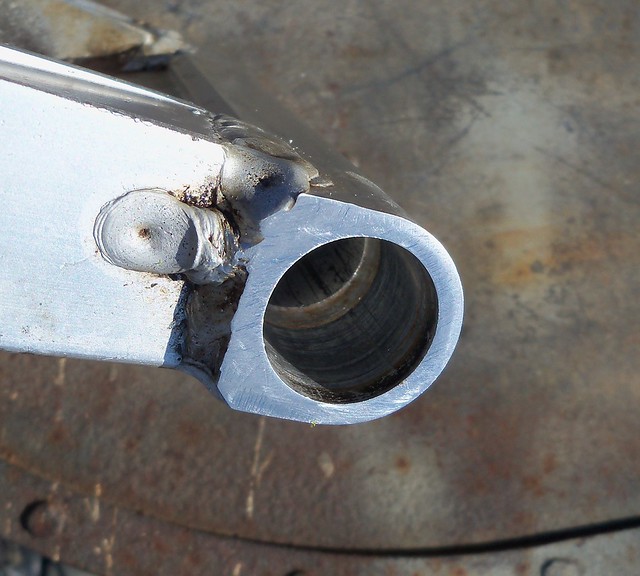
The PE250 swingarm has a 10mm wide bushing and 25mm wide needle bearings. As you can see the needle bearings are shot, which is probably the reason so many of these swingarms are cracked at the pivot. It didn't come with a pivot tube or bolt. Some guys use a reducer to fit the smaller bolt to the XT frame, but I'll adapt the XT pivot tube and bolt to the PE swingarm.
100_5758

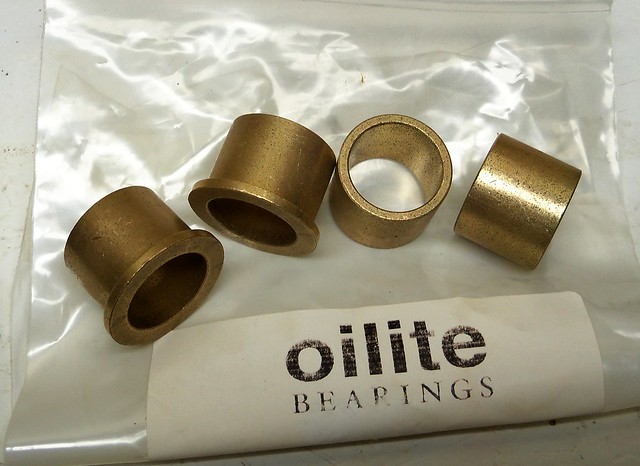
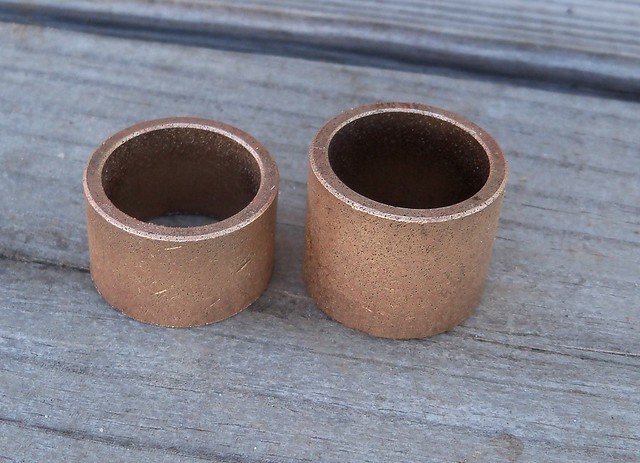
I don't know if it is the best way, but I think the most simple and bomb proof way to fit the XT pivot is to use bronze bushings. I ordered some from McMaster-Carr. I got two 6659k46 flanged bushings ($4.31 each) and two 6658k51 bushings ($4.38 each). The reason for two per side is that the flanged bushings themselves aren't long enough.
100_5771

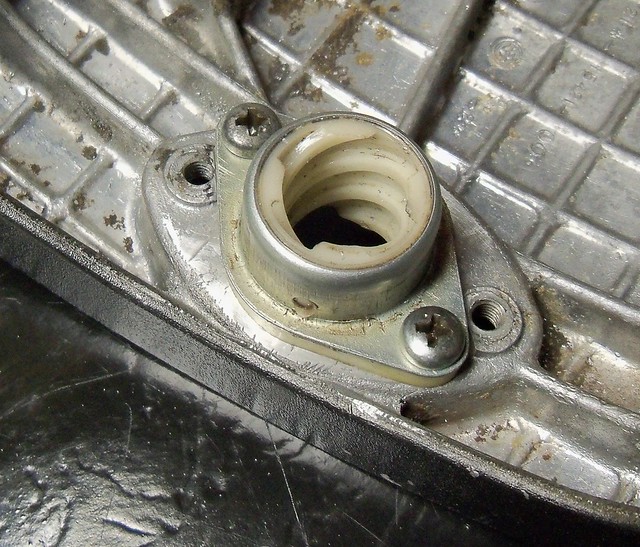
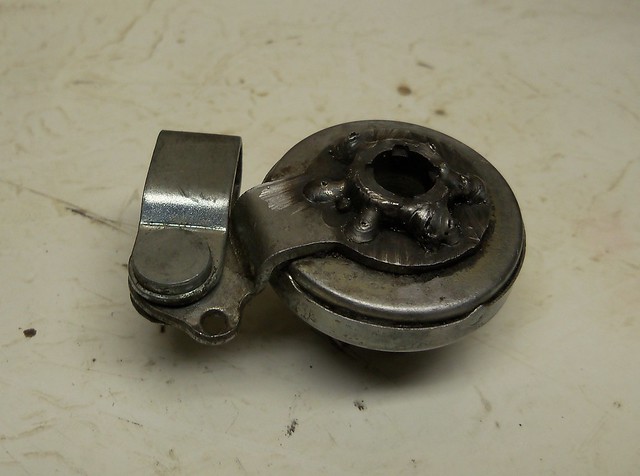
The PE250 swingarm caps are a current Suzuki part and about $5 each.
100_5773

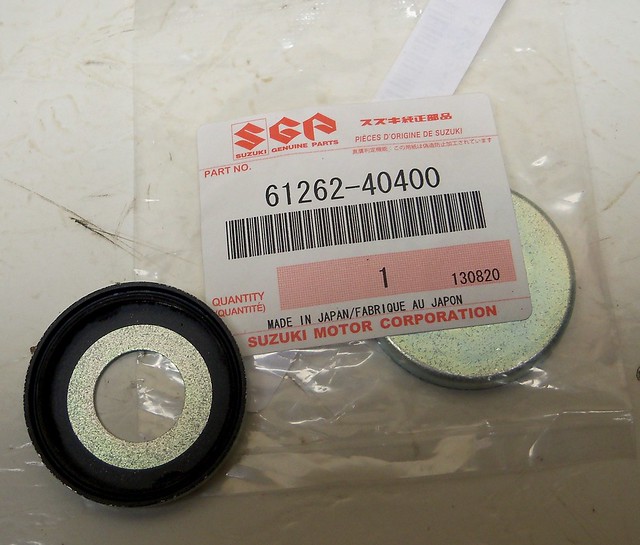
The caps are a good fit on the bushings. I did need to open up the hole on the caps for the larger XT pivot bolt.
100_5780

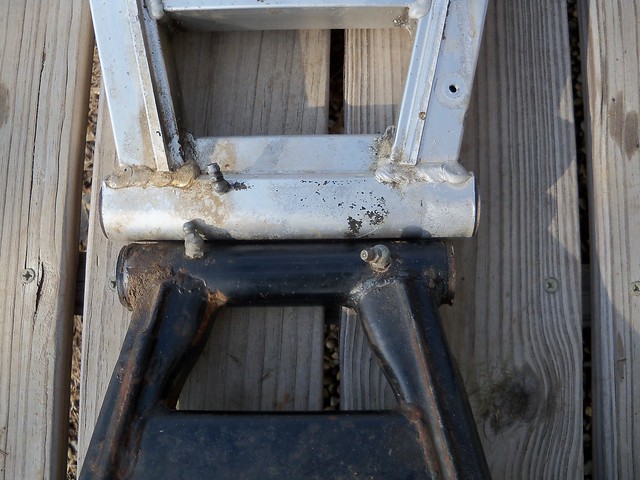
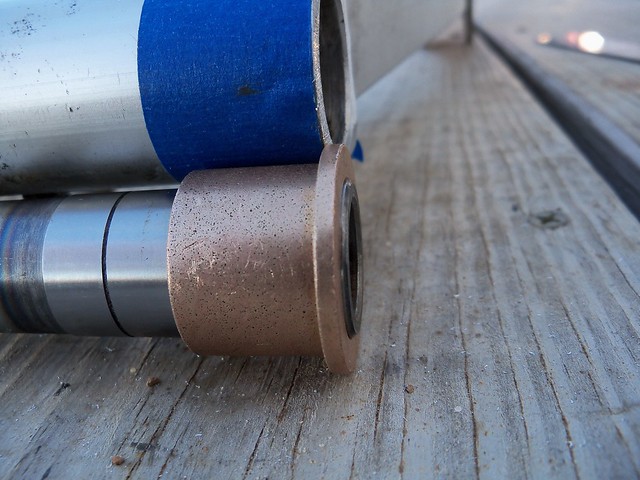
This is the pivot tube from the XT swingarm. The XT pivot tube is 22mm OD, while the PE tube is 20mm OD.
100_5777

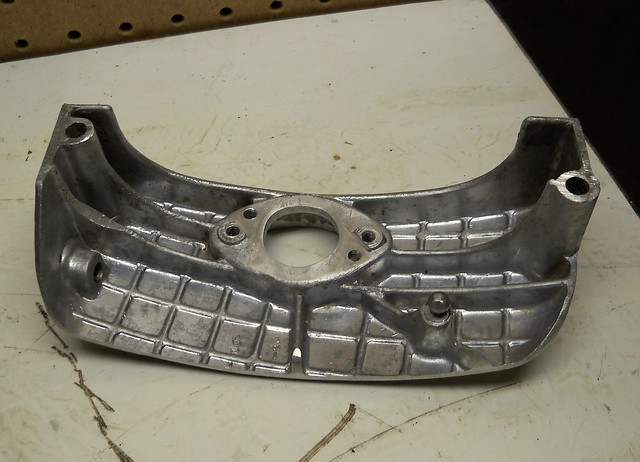
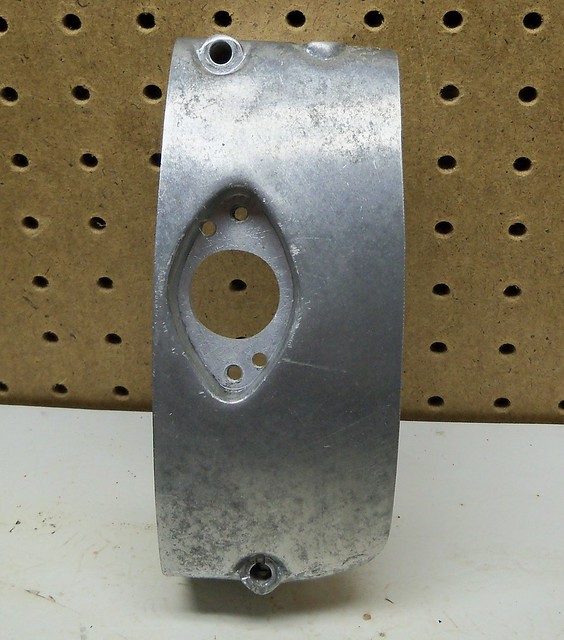
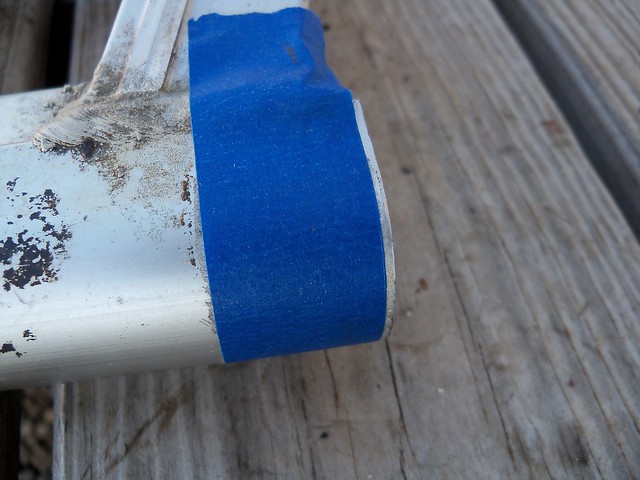
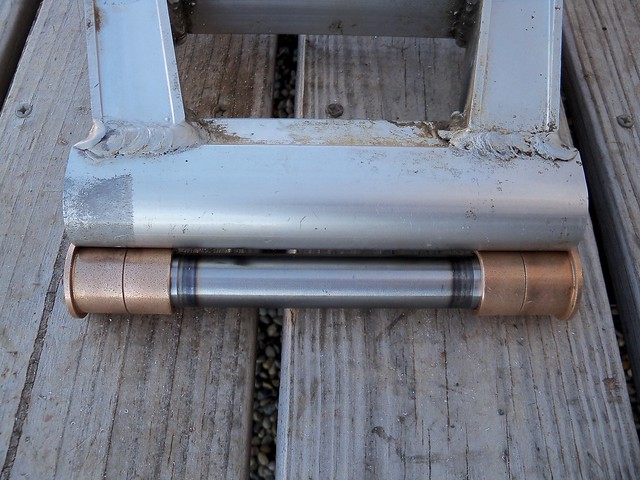
The XT pivot tube is roughly 197mm. The PE swingarm is 194mm wide at the pivot. The flange on the bushings is 2.5mm per side. I needed to trim about 1.5mm per side from the swingarm so the width with the bushings installed would be 196mm. I used masking tape as a guide and trimmed it with a flapper wheel on an angle grinder.
100_5787

This will let the frame "capture" the pivot tube when the pivot bolt is tightened. There is a little bit of wiggle room to play with here. If the bushings end up a little too wide you can sand or trim them a bit. If the bushings end up too narrow, you can use shims that fit over the pivot tube so you don't have too much side play.
100_5797

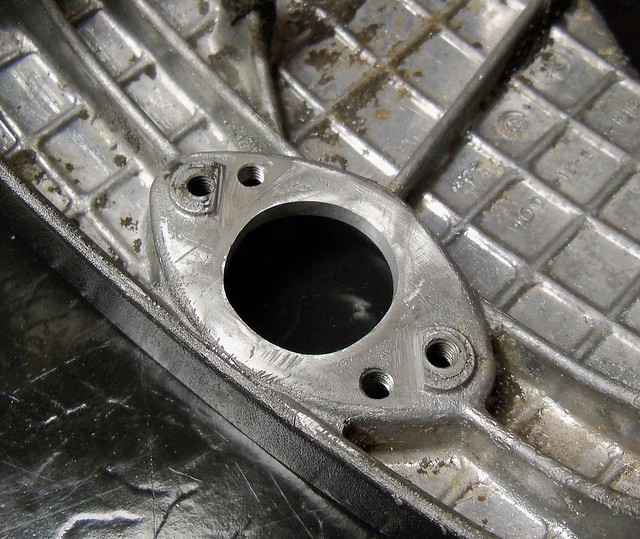
After trimming there was about 38mm of machined area for the bushings.
100_5804

I needed to shorten the bushings so they would fit, one of them cut here.
100_5807

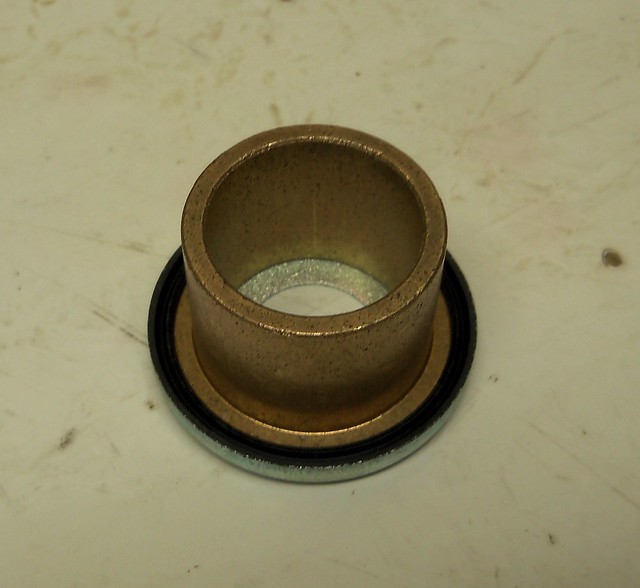
Here are the bushings ready to press in. After pressing them in I needed to use a brake hone on them so the pivot tube would go in smoothly. The Suzuki end caps were a bit thinner than the XT caps, so I used thin washers under them to fit against the tube (not over it), to get the final width just right.
100_5810

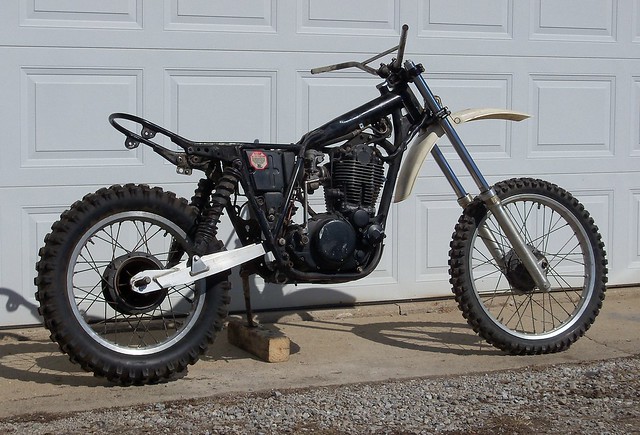
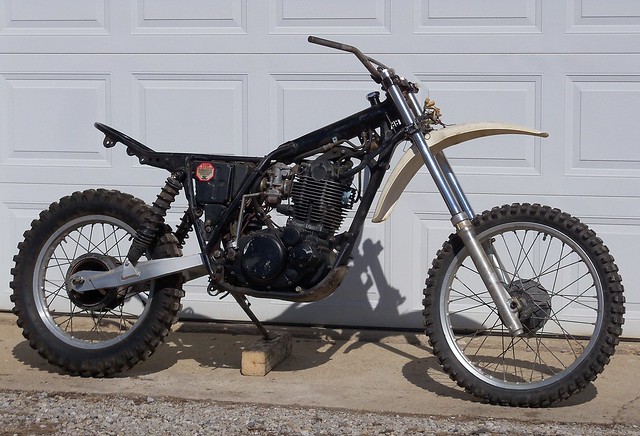
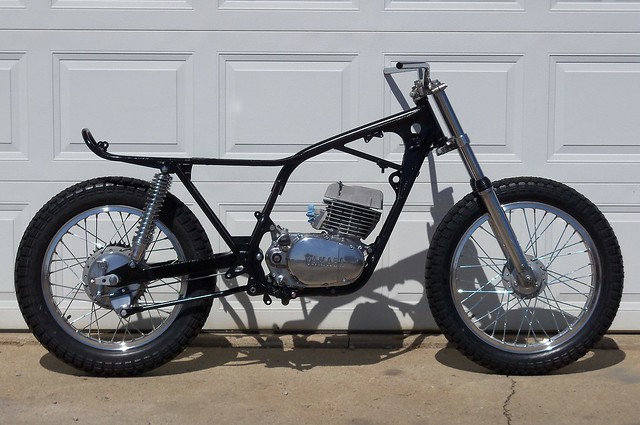
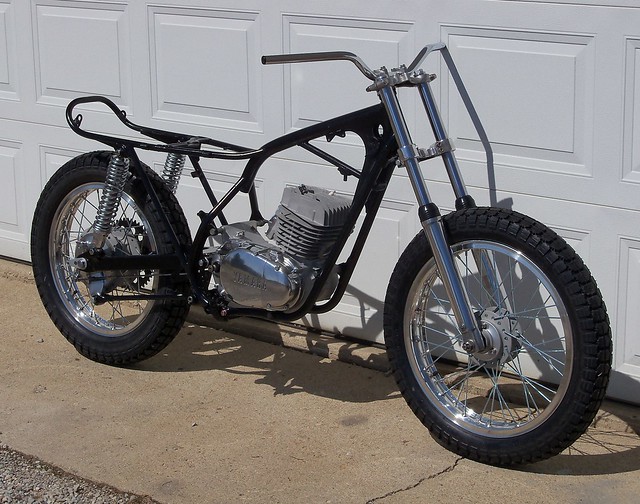
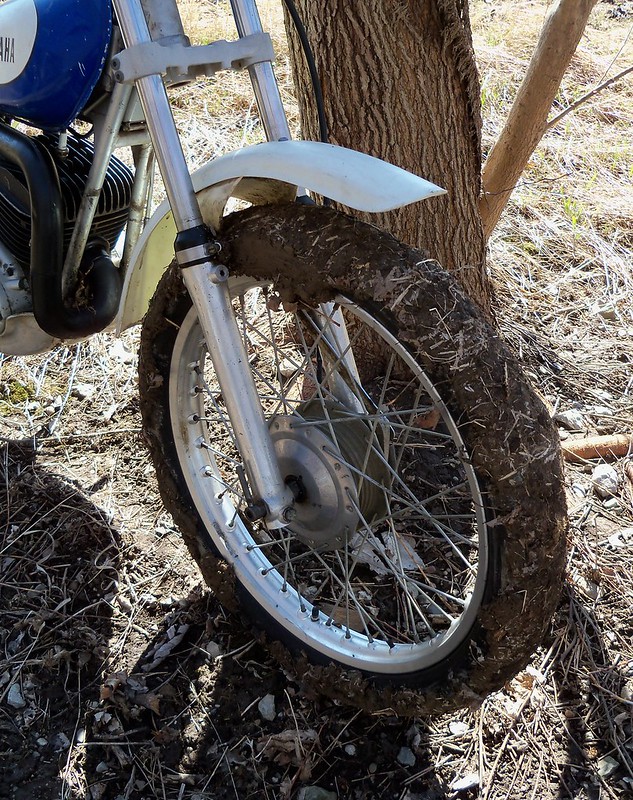
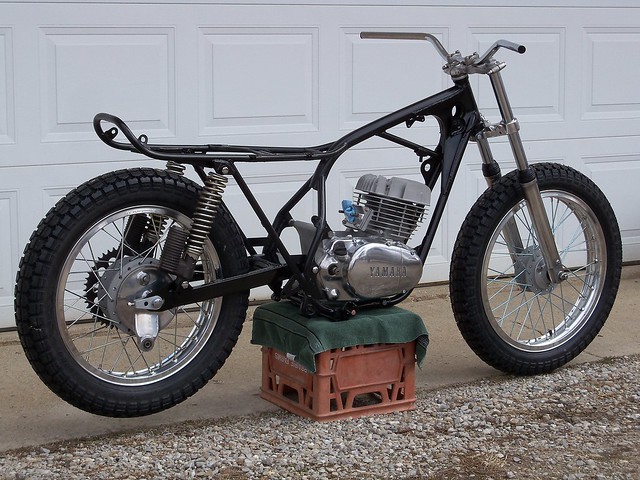
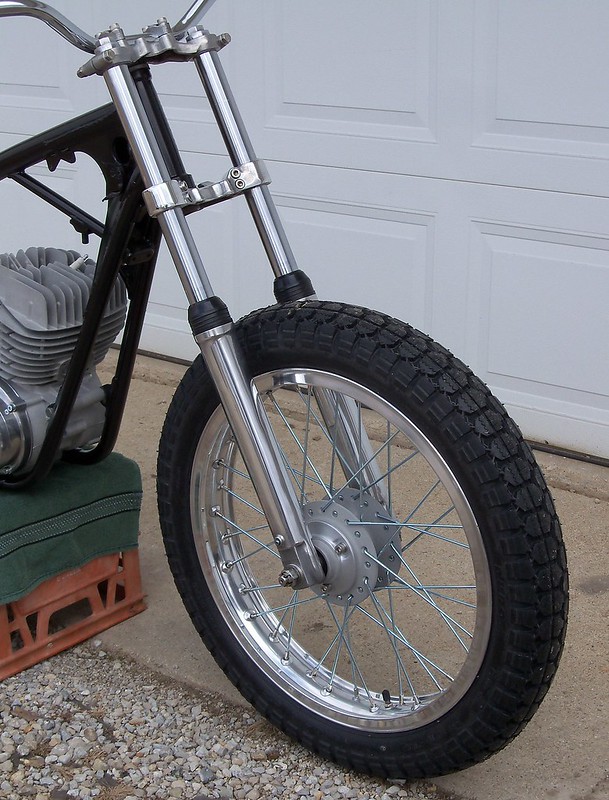
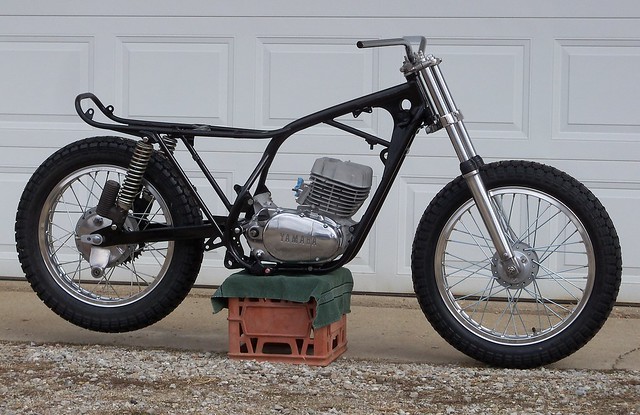
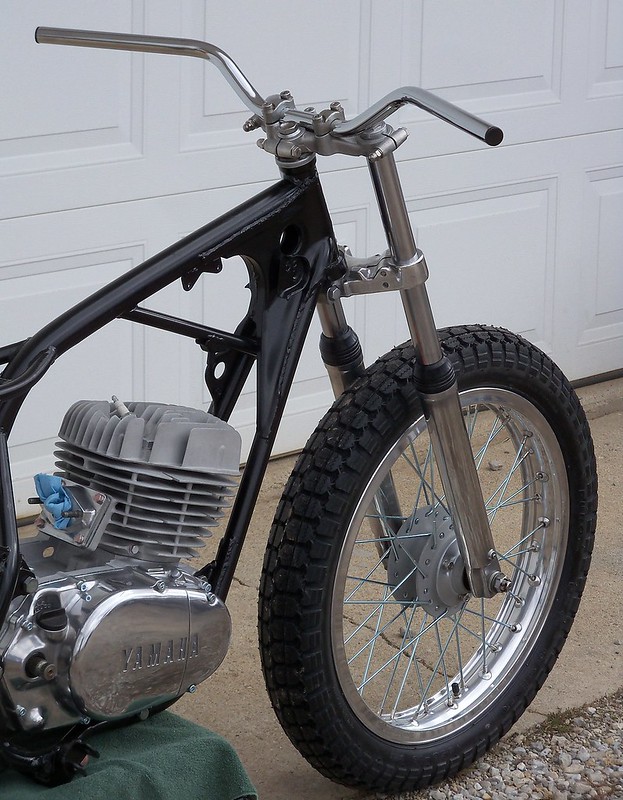
And it's on the bike. I used a '81 IT465 (or thereabouts) 38mm front end to make it a rolling mock-up, but I might end up using a '82 and up 43mm set of forks on it. Something I really don't want to do, but need to consider is de-raking the frame. Yamaha put about 5 degrees too much rake in these bike. I'll be using a TT500 rear wheel, so next up on this project will be fitting it to the swingarm.
100_5816

100_5822

3/3/14

TY250

I picked this up at the swap meet over the weekend. It is a 1976 TY250 trials bike. It runs and rides, but has some missing or incorrect bits. I'll give it a mechanical going over and just have fun with it as it is for now. I'll keep an eye out for some of the missing parts and maybe do a restoration some day.
100_5733

100_5748

3/1/14

DT1 flat track project

I want to run a cut down sprocket cover on the DT. Usually I don't mind cutting up stock parts, but this sprocket cover is not one of them. Nice '68-'73 DT and RT sprocket covers can be difficult to find and pricey since so many were broken from owners who ran chains until they broke, which usually damaged the cover. I scored the black broken one on ebay to use, saving the nice one for use on something later on. The seller listed it for 99 cents for the purpose of someone using it for what I'm doing. That was really cool, rather than just throwing it away.
100_5677

It also has a broken actuator housing.
100_5678

A common problem with the stock DT actuator is that the nylon worm gear cracks making the actuator eventually fail completely, and they are an obsolete part. If the clutch pull on a DT is getting hard, this is likely the problem. Yamaha Enduro forum member Deet posted a thread on converting to the steel worm gear Yamaha actuator. I'm using a used XS650 actuator, but they are also available new from MikesXS.
100_5681

I used a cut-off wheel to remove the rest of the actuator housing, then enlarged the opening with a die grinder to fit the XS housing. Next two holes are drilled and tapped for 5mm threads. I also clearanced some of the material around the adjustment cover bolt holes.
100_5688

The XS650 actuator housing then fits in place.
100_5692

The XS actuator has a longer and differently shaped arm than the DT. I think an RD actuator might have the correct arm, but it is easy to swap the steel worm gear to the DT arm, which also allows you to put the arm just where you want it with the actuator fully retracted.
100_5693

There are three parts to the actuator; the worm gear, seal housing, and arm. To disassemble the worm gear from the arm, first grind the welds. Then place the actuator in a deep well socket and tap the worm gear out from the arm, leaving the arm and seal housing together. Trying to separate the arm from the seal housing could destroy the thin seal housing. Then determine where it needs to go by test fitting it in the sprocket cover. Spot weld it in place, letting it cool between welds to not damage the seal.
100_5702

The stock DT adjustment screw is used, the XS screw being too long. This is a mod I'd do to a nice sprocket cover, since it doesn't change the looks any.
100_5714

I then trimmed it and used some paint stripper to remove the black paint.
100_5730

Now I just need to polish it and clean, grease, and install the actuator parts.
100_5727