7/19/14

XS650 Special

I got started on fitting the DT1 front fender. Here are the adapter brackets roughed in to see if it would work. They are cut from an old XS front fender.
100_7952

I like it at this height, so just need to finish the brackets off, and restore the fender.
100_7946

100_7949

I need to finish the wiring on the new regulator and rectifier, and the mechanical work I wanted to do will be done.
100_7858

100_7892

7/18/14

DT1 flat track project

I ended up going with a new 30mm carb for the DT. It is a Mikuni VM30-83.
100_7879

I'd already bought an adapter for a smaller carb, but needed to get a different one for the VM30. It is part number m-vm34-200k. I had to drill out the holes to 8mm, and go to cap screws instead of the stock studs to fasten it to the manifold since there isn't enough clearance for nuts.
100_7880

The air filter is a UNI angled 2 stage part number UP-4229AST.
100_7888

The throttle is Emgo part number 44-97760. It looks to be the same part as the Motion Pro Turbo throttle I have on my SR500. The cable is Barnett part number 101-80-30007. It is a universal cable for Gunner Gasser applications, so also fits knock-offs like the Emgo.
100_7883

I use Yamalube 2S in the oil tank on my DT3, but since I'm running pre-mix on this bike I'll be using Maxima Castor 927.
100_7904

The coil is Emgo part number 24-71532. The center-to-center distance is shorter than the stock coil, so I had to drill the frame bracket.
100_7890

The chain is a cheap ebay 520 non o-ring. It looks nice.
100_7908

Normally there is a gusset/bracket where the filter is, but apparently it was cut off at some point in this bike's life, probably to fit a filter like this one. The filter clears the frame, but the outer cover touches the rear of the engine case, which isn't a concern.
100_7930

100_7933

The list of things to do before first start-up is getting short.
100_7919

100_7934

100_7914

7/17/14

XS650 Special

I want to get the carbs spot on, so I'm replacing the old diaphragms with new ones from JBM Industries. These really are a great product at a low price.
100_7854

JBM shows snips being used to remove the plastic retaining rings, but I've had better luck using a cut-off wheel and a utility knife.
100_7819

I cut off the old diaphragms, and then using the cut-off wheel cut into the plastic, being sure not to cut into the slide.
100_7823

I then score the remaining part with a utility knife most of the rest of the way through.
100_7831

Then use a flat blade screw driver to pop them the rest of the way.
100_7834

I'm painting the tank and side covers just like the DT flat tracker, starting with Dupli-Color white.
100_7816

First wet sanding, and then lots of dry time before masking and the color coat.
100_7815

The roll of 3M tape I bought for the DT is enough to do a few bikes.
100_7841

Here I am laying out the side cover stripes on the bike, using a spare AT/CT tank for reference.
100_7844

I'm not sure yet if I'll be able to use these decals. I'd thought of cutting them up to say 650, but the 360 has a larger white outline, and the numbers are slightly taller. If I can't make it work with some hobby knife magic, I might have to have some made.
100_7868

Here is the color coat, the same VHT "gold flake" as the DT, right after spraying and peeling the tape. Like with the DT, it'll take on a different look after wet sanding and clear coat.
100_7866

100_7863

I got this DT1 front fender cheap since it has some dents, but nothing some hammer and dolly work can't fix. It fits the fat front tire, so I'll have to see about making some brackets and adapting it to the XS forks. This is a normally pricey part, so I won't use it if I have to modify it.
100_7874

7/16/14

Mid-America Speedway - Night After the Indy Mile - August 9


Go to http://www.midamspeedway.com/ or Stu's Shots R Us for more information on this event. Click here to see the my pictures from the 2013 race.

7/7/14

RZ50


source: http://auctions.search.yahoo.co.jp/search?p=rz&oq=&auccat=26316

XS650 Special

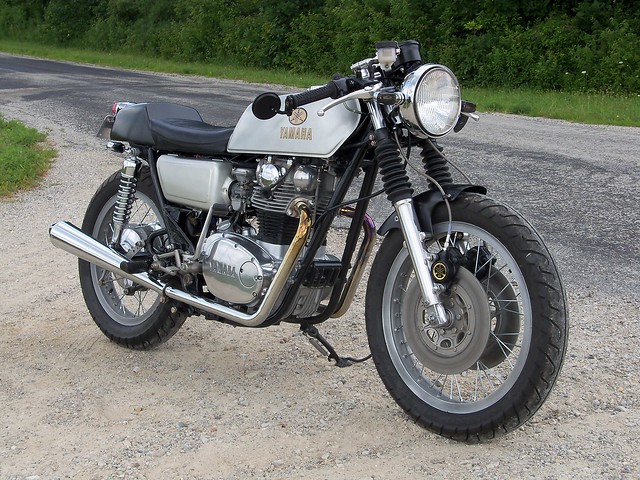
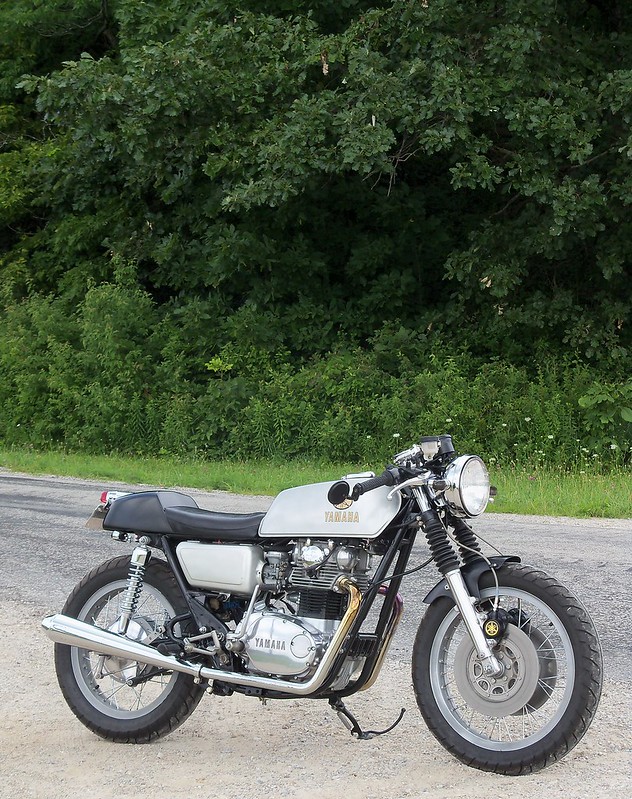
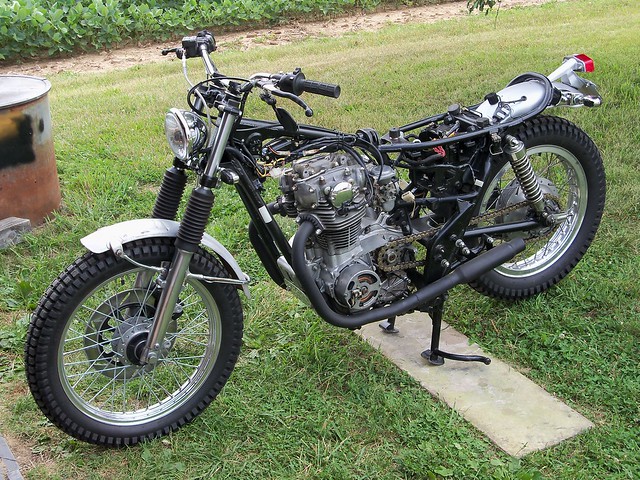
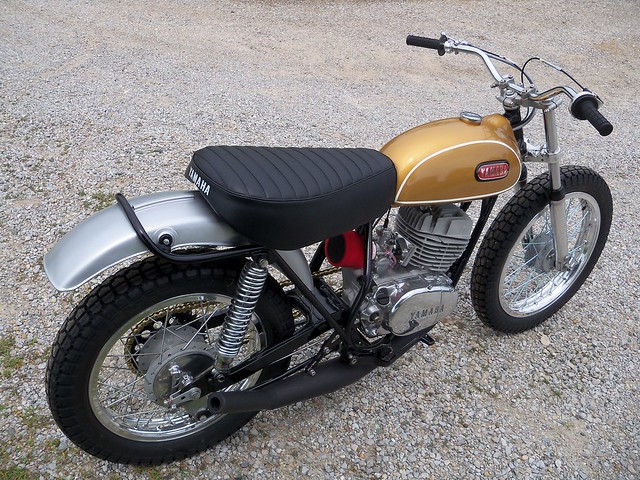
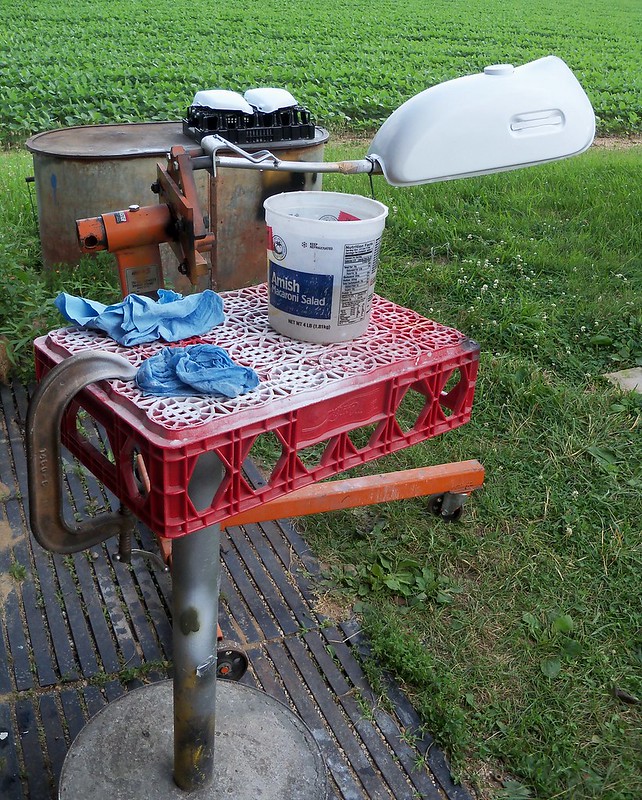
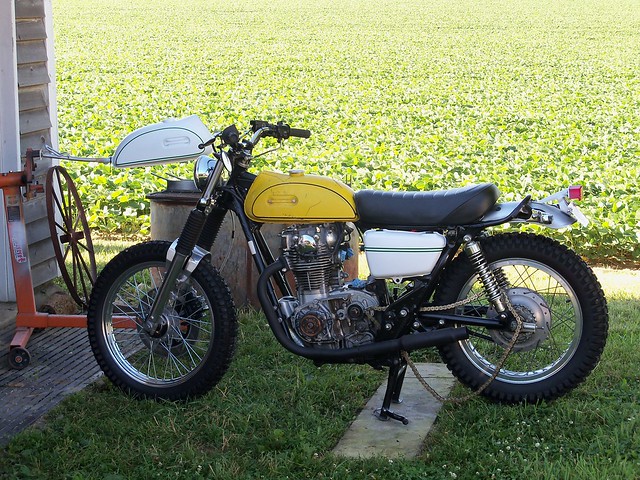
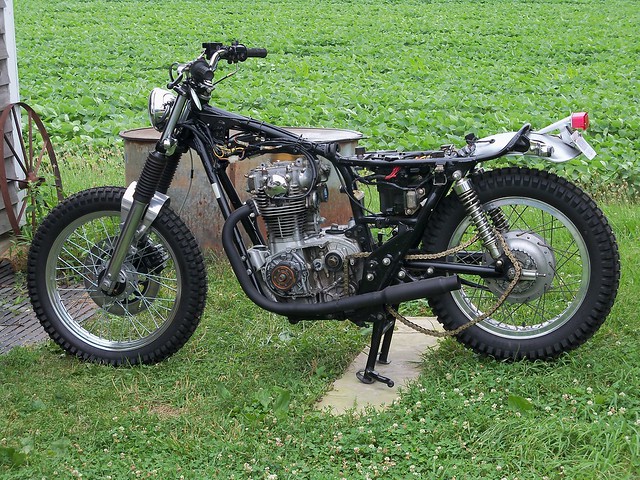
I'm doing a paint job on my '79 Special.
100_4242

While it is down for paint I figured it would be a great time to give it a mechanical going over also.
100_7799

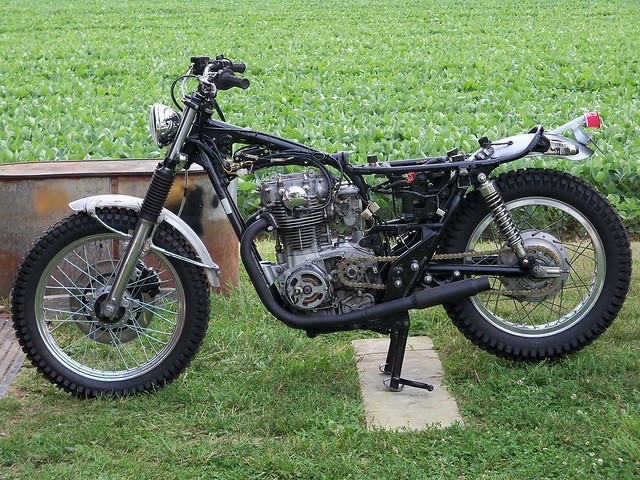
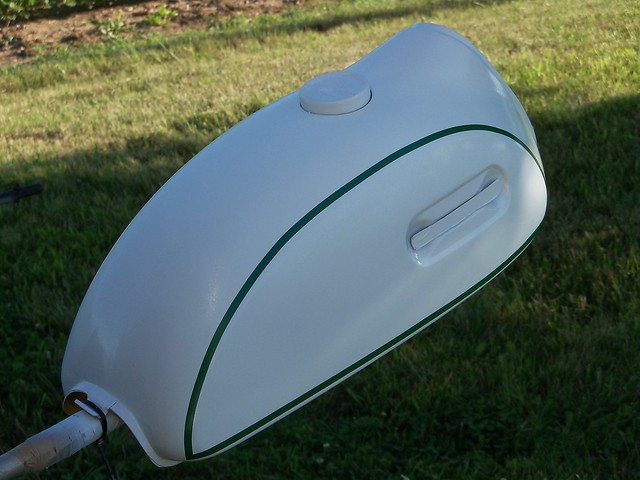
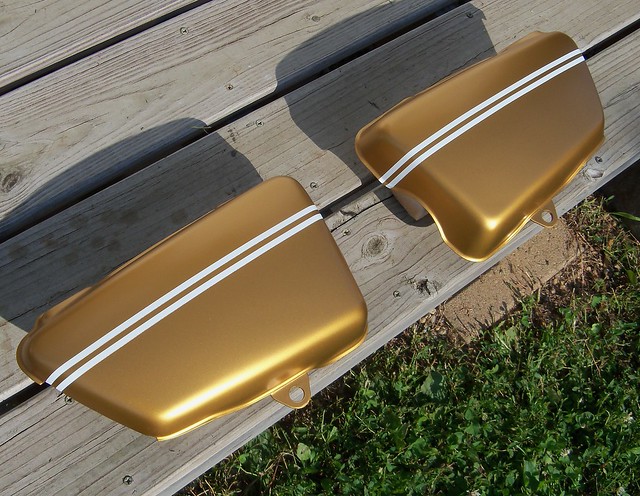
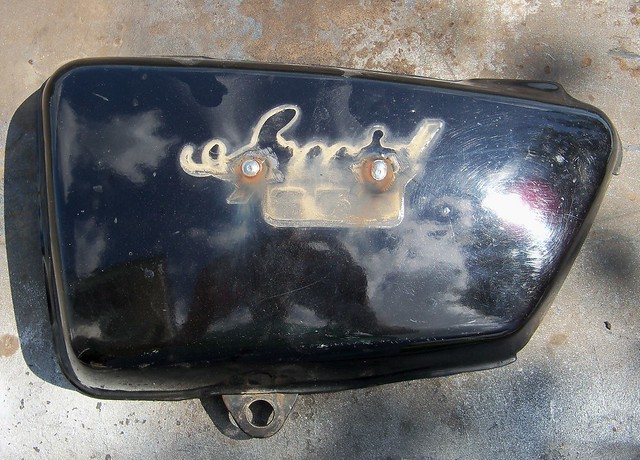
I removed the side cover badges and welded up the holes.
100_7684

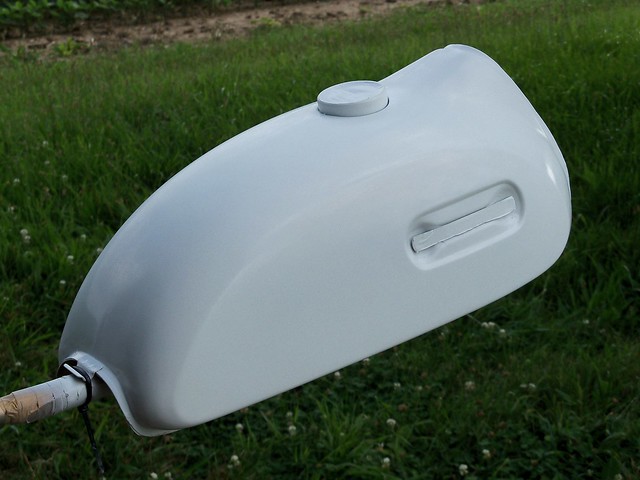
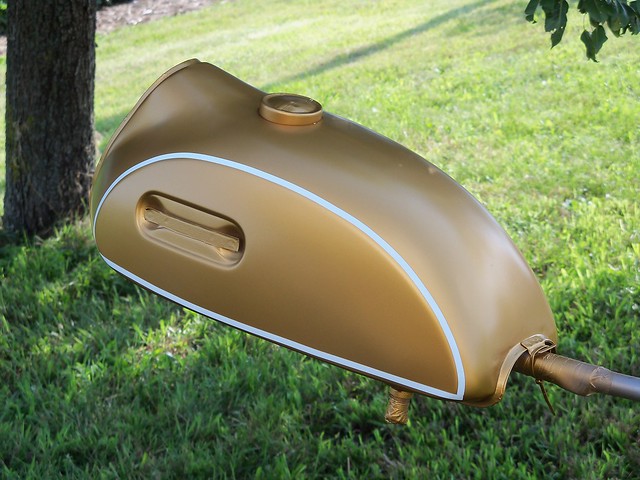
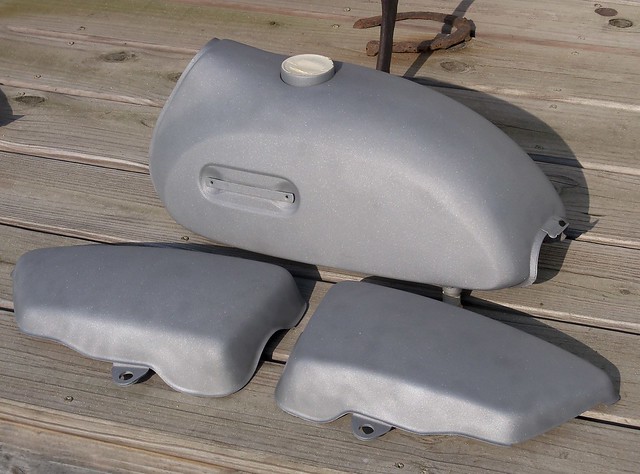
Overall the tank looked decent, but the topcoat was flaking off, and there were some rust spots. Patina is good, but rust is bad.
100_7689

100_7687

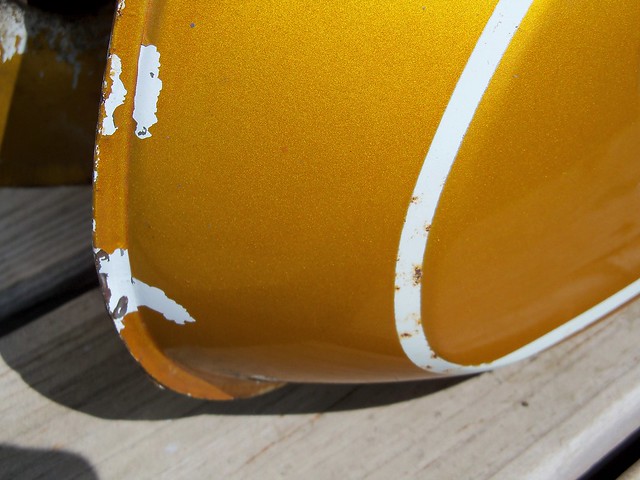
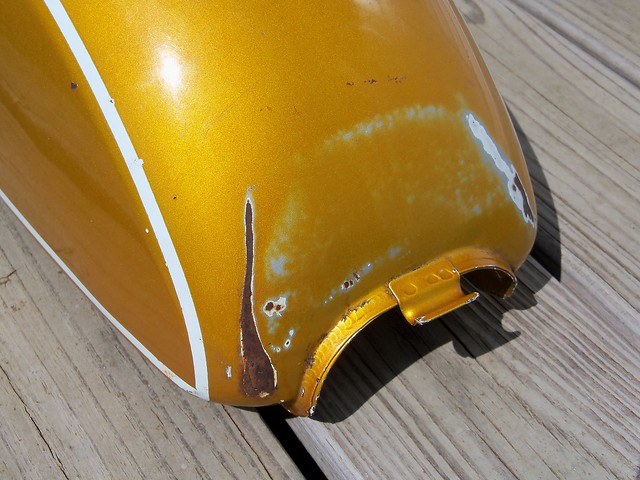
Here they are cleaned up and ready for bodywork and paint.
100_7708

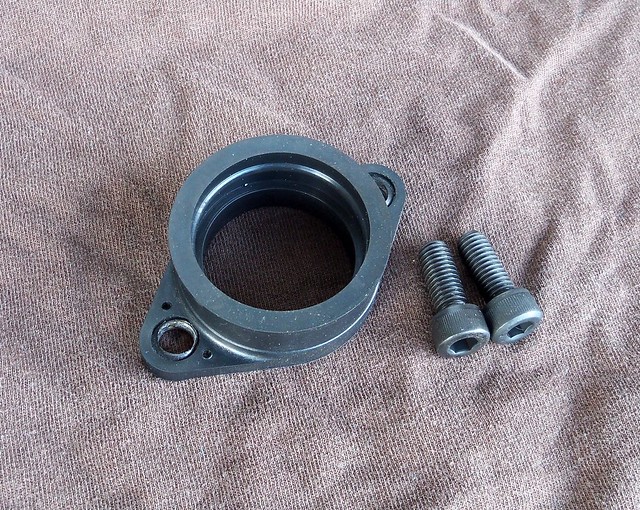
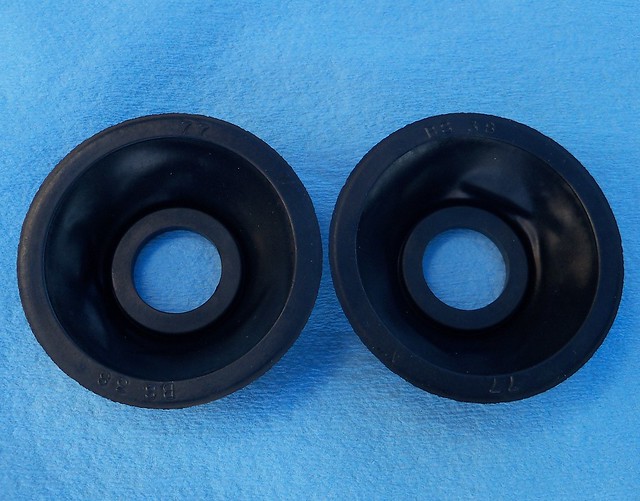
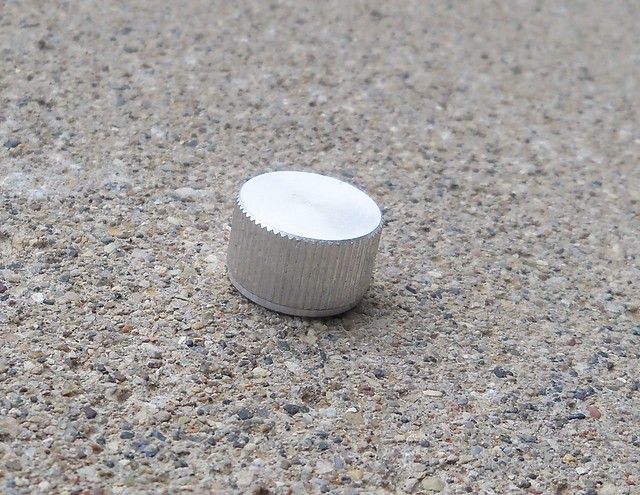
I'm not using a tach, and had just stuck a rubber cap over the drive. This block-off from MikesXS looks much better.
100_7784

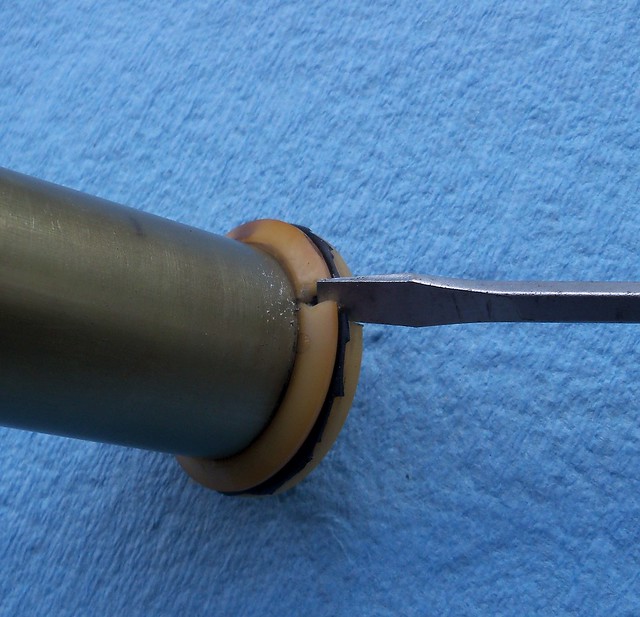
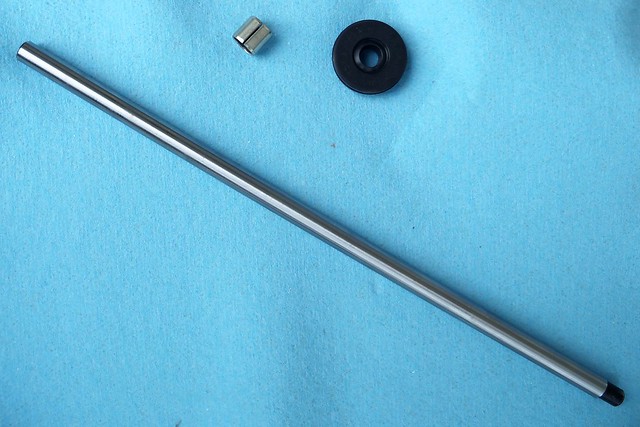
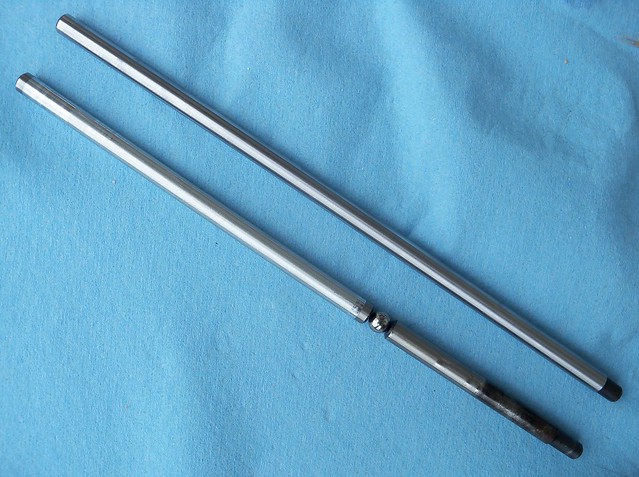
I'd replaced the clutch pushrod seal once before, but knew I'd be back soon since the pushrod had quite a bit of side-to-side play, and it recently started leaking badly. Time for a new bushing and a '70-'75 style one piece pushrod, the new parts shown here. First remove the left side engine cover, the front sprocket, and then pull out the short outer rod.
100_7761

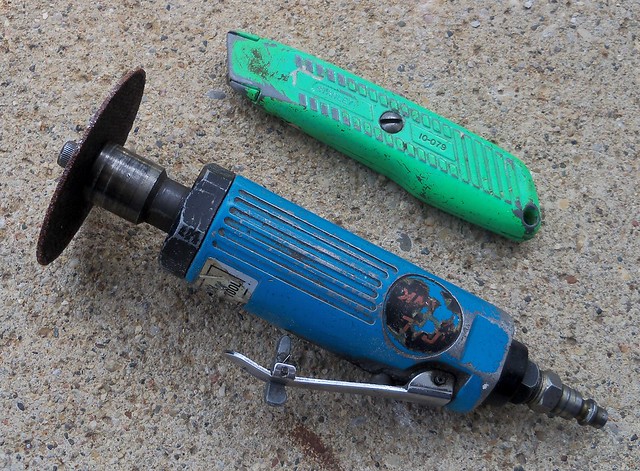
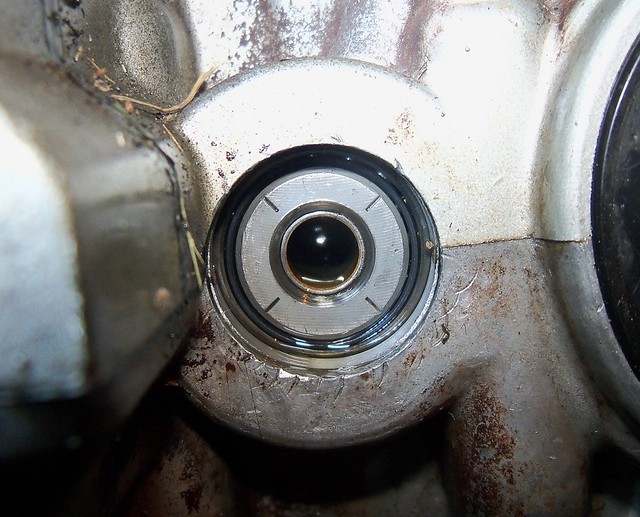
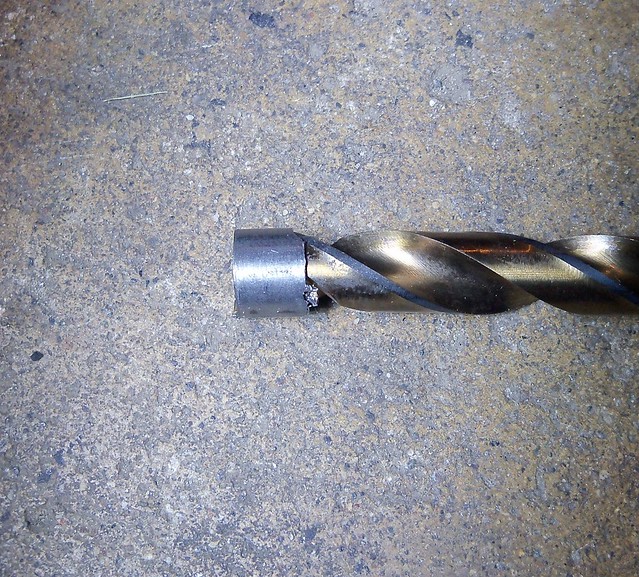
Here is the old bushing that needs to be removed. Note the split at about the 1 o'clock position. Some knock the bushing open here and pull it out with needle nose pliers. MikesXS has a how-to using a 11/32" drill bit and then a 23/64" bit to remove it.
100_7741

I used the 3/8" bit method. Go slow with the drill, and the bit grabs the bushing. Keep the drill turning slowly and pull it out. Then look inside with a light and use a q-tip to remove any debris, although using this method it didn't leave any.
100_7754

Then use a magnetic tip screwdriver or telescoping magnet to remove the first ball and longer inner pushrod. Here is the new one piece rod with the parts it replaces.
100_7763

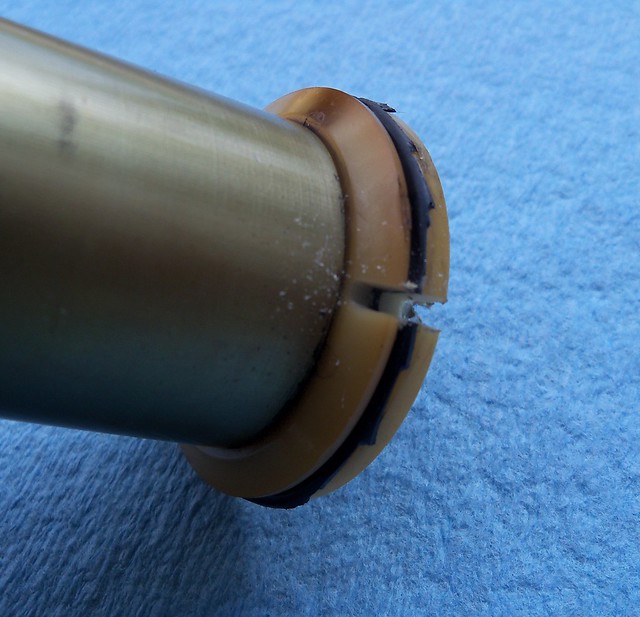
Then gently tap in the new bushing and seal, and oil and slide in the pushrod. The seals are supposed to be replaced with the cases split, so can be a little tricky. Chamfering the outside corners first, to remove the knife edge makes it much easier. I painted the outside edges with Threebond 1194. It probably doesn't do any good, but can't hurt either.
100_7780

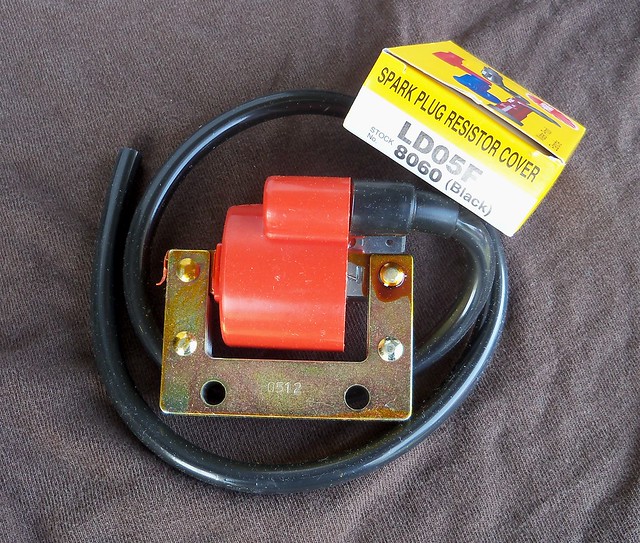
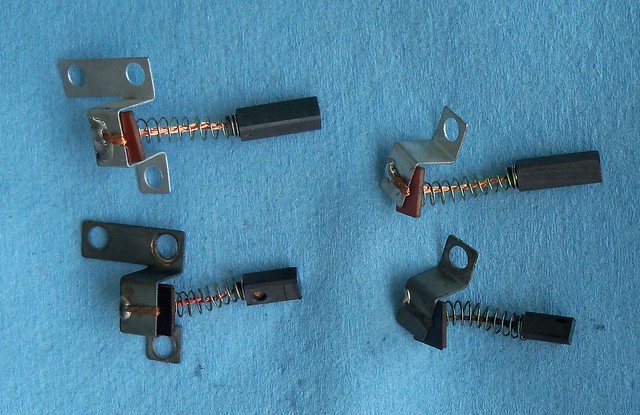
The charging system on the bike worked fine, but this is one area where you don't wait until it's broke to fix it. The old alternator brushes are on the bottom, and the new ones on top.
100_7794

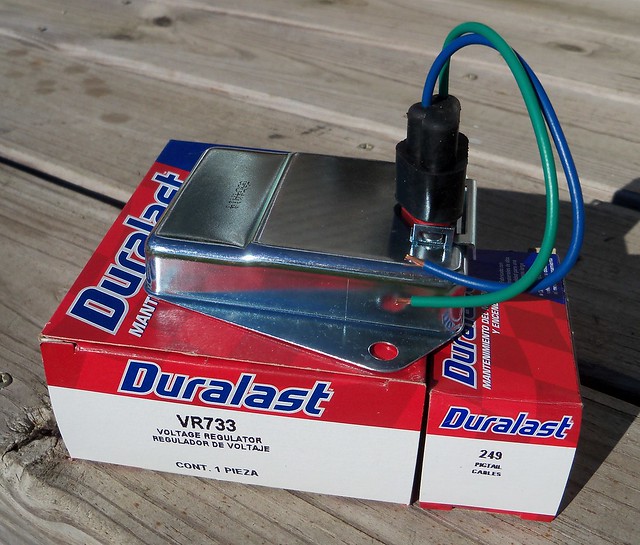
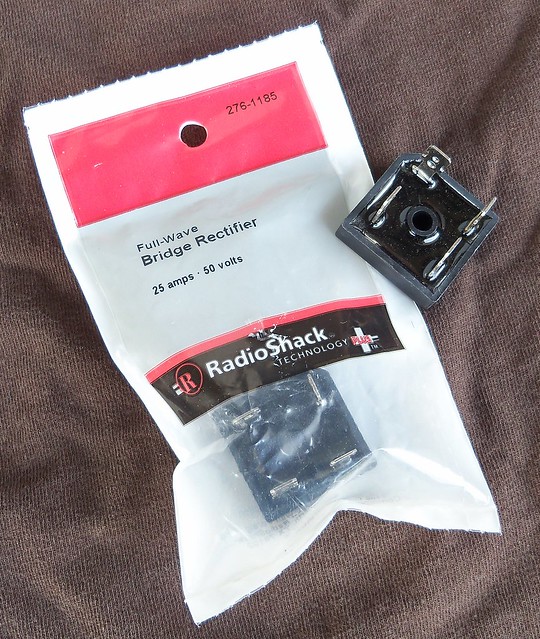
I'm doing Pamcopete's Chrysler regulator and Radio Shack rectifier conversion like I did on my '75, so installed the inner brush with nylon screws to unground it.
100_7805

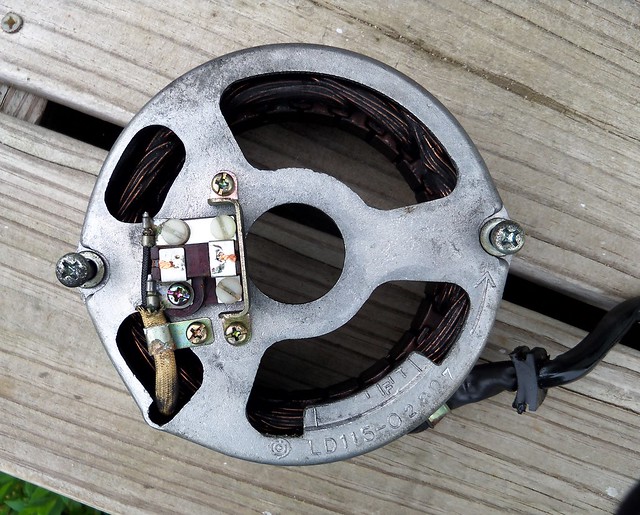
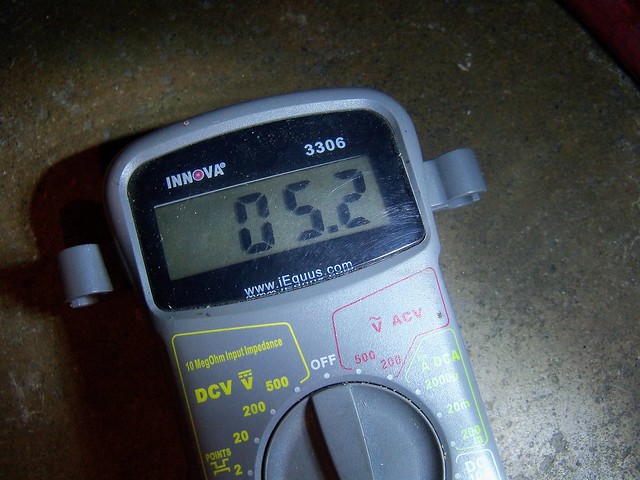
I've got 5.2 ohms between the slip rings on the rotor, so good to go.
100_7797