
7/14/12

XS650 cafe' project - rearsets part 2
The brake side is the hardest, so starting with it first. First I need the brake pedal pivot, using a Suzuki T500 rod, piston pin, and needle bearings for this.
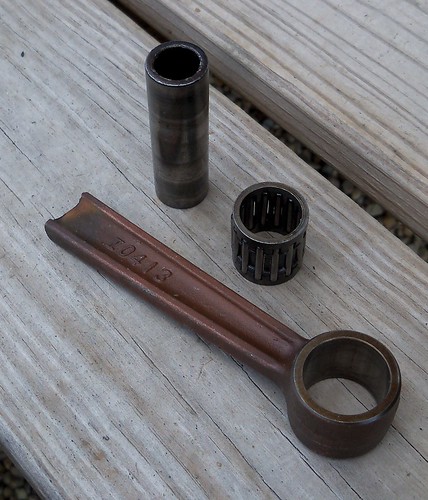
I cut the corners off a nut so it would fit inside the pin...

...and welded it in.This is what will hold the pedal in place.

I welded in a large washer to the pivot pin behind the pedal, and tacked the pivot pin to the footrest mounts. Once this was in place I worked the lengths of the linkages.

A couple nuts and some bronze bushings...

...part of a wrench...

...and I have the brake rod. I drilled out the centers of the nuts to fit the bushings, and then the bushings cut just slightly wider than the nuts. A heim joint type linkage would probably be better, but this should work.

Starting on the brake pedal, I first drilled and tapped a hole, then trimmed a nut to fit and welded it in so I'd have more thread area and a flat surface to go against the brake rod.

The last part of the linkage was the splined section from the stock brake pedal cut, drilled, and tapped.

The front part of the stock pedal...

...welded to the pivot for a completed brake pedal.

Here it is put together on the bike. Almost done on this side, other than some cosmetic welding and grinding. Like with most rearsets on an XS650 the kicker pedal needs heated and bent to clear, so I'll have to work that out next. The brake pedal feels excellent, just in the right spot, and pedal pressure is about right, but hard to say for sure before riding. I'm diggin' the looks of them. They look like something from a blacksmith shop.


I cut the corners off a nut so it would fit inside the pin...
...and welded it in.This is what will hold the pedal in place.
I welded in a large washer to the pivot pin behind the pedal, and tacked the pivot pin to the footrest mounts. Once this was in place I worked the lengths of the linkages.
A couple nuts and some bronze bushings...
...part of a wrench...
...and I have the brake rod. I drilled out the centers of the nuts to fit the bushings, and then the bushings cut just slightly wider than the nuts. A heim joint type linkage would probably be better, but this should work.
Starting on the brake pedal, I first drilled and tapped a hole, then trimmed a nut to fit and welded it in so I'd have more thread area and a flat surface to go against the brake rod.
The last part of the linkage was the splined section from the stock brake pedal cut, drilled, and tapped.
The front part of the stock pedal...
...welded to the pivot for a completed brake pedal.
Here it is put together on the bike. Almost done on this side, other than some cosmetic welding and grinding. Like with most rearsets on an XS650 the kicker pedal needs heated and bent to clear, so I'll have to work that out next. The brake pedal feels excellent, just in the right spot, and pedal pressure is about right, but hard to say for sure before riding. I'm diggin' the looks of them. They look like something from a blacksmith shop.
7/12/12
XS650 cafe' project - rearsets part 1
Time to make some rearsets for the XS650. This will be reworking stock parts again, since I want to save money for the rebuild, and this way I'll get the pegs just where I want them. I like them right in the middle of the seat, so directly under me. Starting with the stock footrests, but flipped from one side to the other, and working out the positioning.

Then cut it.

The cut off part is flipped around, since it looked to fit better this way. Working out the height here with both sides at the same time. It is a compromise between legroom and cornering clearance. I ended up with the same ergonomics as my Sportster, roughly 17"-18" inches seat to peg distance. Once this is worked out, then cope the part to fit and remove the paint for welding.

I then put down a bead. I'll finish the brake pedal and shifter before removing the footrests for final welding.

I should have plenty of cornering clearance.

I think they look neat, like rearsets if they had come from the factory that way. The only downside I've seen so far, other than being heavy compared to aftermarket sets, is that being flipped from one side to the other they fold up and forward, instead of back. I don't think this will matter, since some of the aftermarket rearsets are fixed in place anyway, and I doubt I'll be dragging them much.


Then cut it.
The cut off part is flipped around, since it looked to fit better this way. Working out the height here with both sides at the same time. It is a compromise between legroom and cornering clearance. I ended up with the same ergonomics as my Sportster, roughly 17"-18" inches seat to peg distance. Once this is worked out, then cope the part to fit and remove the paint for welding.
I then put down a bead. I'll finish the brake pedal and shifter before removing the footrests for final welding.
I should have plenty of cornering clearance.
I think they look neat, like rearsets if they had come from the factory that way. The only downside I've seen so far, other than being heavy compared to aftermarket sets, is that being flipped from one side to the other they fold up and forward, instead of back. I don't think this will matter, since some of the aftermarket rearsets are fixed in place anyway, and I doubt I'll be dragging them much.
7/9/12
XS650 cafe' project
I'm going to use a few bits left over from the SR500 on the '75 XS650. The SR headlight bracket will be cut up and welded to mount the headlight. This fixes a couple things in that it will lower the headlight, and also eliminates the stock headlight mounts that won't work with clip-ons (the clubmans are just for mock up). I'm also going to use the SR headlight.

Just test fitting here. Some small aftermarket gauges would be an easier fit, but I'd rather use the stock ones if I can get them to fit decently.

Getting the SR500 headlight and bracket to fit on the '75 XS650's 34mm front end, first thing was to shorten the bottom, saving the mounting tabs. The chrome on the outside of the ears is fine, but typical rust on the inside, so that will just get cleaned up and brushed with paint.

It will bolt on the same two places as the stock XS bottom headlight mount, getting the height and positioning just right here, since everything else is based off of this.

Welded up.

Next I removed the SR top mounting brackets, and tied the top together with flat stock. Then two pieces of 1/2" steel tubing from top to bottom, and some very thick tubing to mount the gauges. It will get painted black eventually. This is it after cleaning it by sandblasting.

The tubing just slides up the threads of bolts in the stock gauge mount in the top fork clamp, using some hose as bushings.

It drops the gauges about 3". The headlight is about as low as it can go maintaining plenty of clearance with the front fender at full suspension travel. The gauges are about 3/8" from the headlight at the closest point.


Just test fitting here. Some small aftermarket gauges would be an easier fit, but I'd rather use the stock ones if I can get them to fit decently.
Getting the SR500 headlight and bracket to fit on the '75 XS650's 34mm front end, first thing was to shorten the bottom, saving the mounting tabs. The chrome on the outside of the ears is fine, but typical rust on the inside, so that will just get cleaned up and brushed with paint.
It will bolt on the same two places as the stock XS bottom headlight mount, getting the height and positioning just right here, since everything else is based off of this.
Welded up.
Next I removed the SR top mounting brackets, and tied the top together with flat stock. Then two pieces of 1/2" steel tubing from top to bottom, and some very thick tubing to mount the gauges. It will get painted black eventually. This is it after cleaning it by sandblasting.
The tubing just slides up the threads of bolts in the stock gauge mount in the top fork clamp, using some hose as bushings.
It drops the gauges about 3". The headlight is about as low as it can go maintaining plenty of clearance with the front fender at full suspension travel. The gauges are about 3/8" from the headlight at the closest point.


7/8/12
SR500 tank painted
After stripping the paint I had to do some rust removal. From the factory the tunnel area is left mostly bare, so always some surface rust in that area.
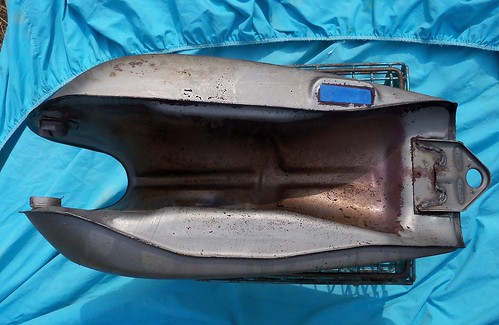
The original paint was cracked, and any area with a crack usually has rust underneath.

This is the area where the stock seat rubbed the paint off.
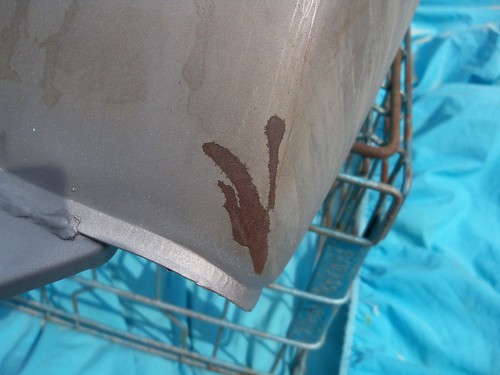
A light sand blasting and it looks mint.


Clean and ready to go. I had a couple small dings that I used body filler to fix.
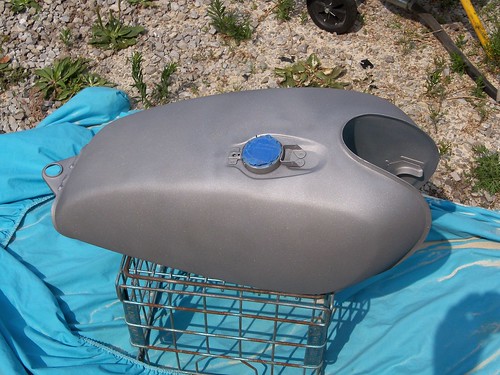
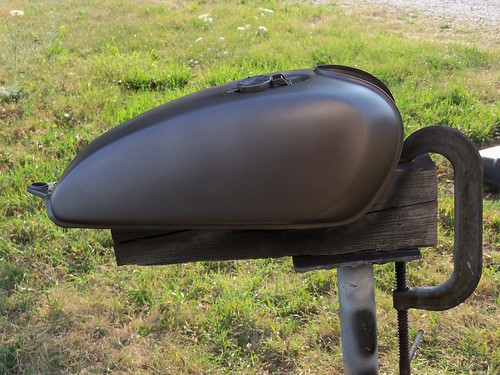
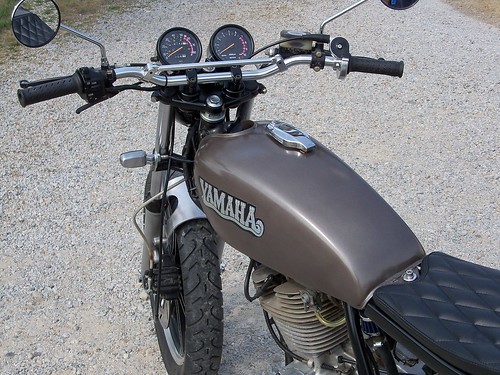
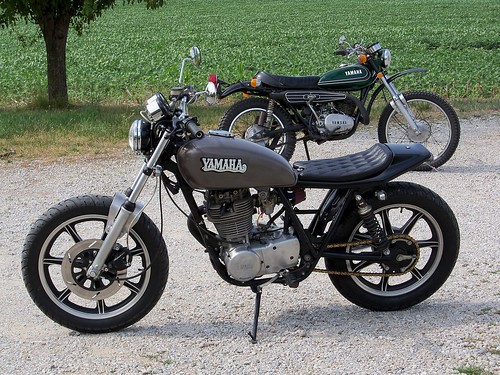
It is just a low cost and simple spray can paint job, using Dupli-Color self-etching primer, Rust-Oleum "metallic dark bronze", and covered with Dupli-Color wheel clear coat. Usually not a good idea to mix brands, but I did a test on a scrap piece of metal, and no interaction problems, so went ahead with the tank.

The Dupli-Color self-etching primer applied, and dry sanded with 400 grit paper.

I did a couple coats of the bronze, wet sanded with 400 grit, applied another coat and wet sanded again. This paint went on very nicely.
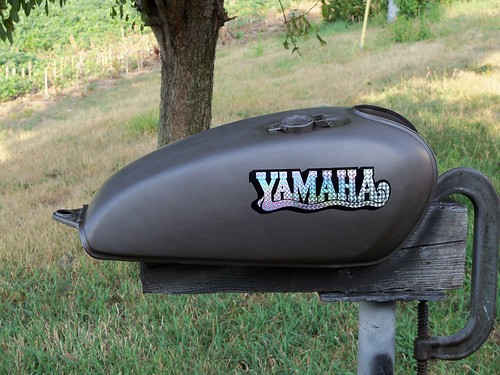
The stickers in place. Looking back, here is where I goofed up somewhat. I wanted the stickers level, so should have set the tank on the bike to apply them, but didn't. The stickers are level, but the tank isn't level on the stand, so the stickers go uphill a little on the bike, but it is not a big deal. Just something I'll keep in mind next time.
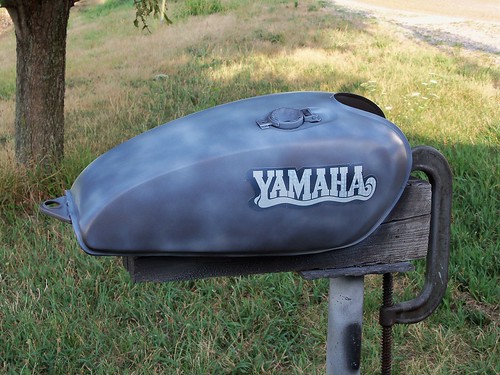
The clear goes on hazy, but clears up when it dries. I did a couple coats, and it went on nice enough that I didn't do any wet sanding, but will just wax and buff it after it cures for a week or two.
The SR500 uses the same gas cap as my '79 XS650 Special, so I ordered an extra gas cap gasket for it from Mikes XS last fall when I did the work on the XS.

I'd never noticed it leaking, but it sure looked bad.

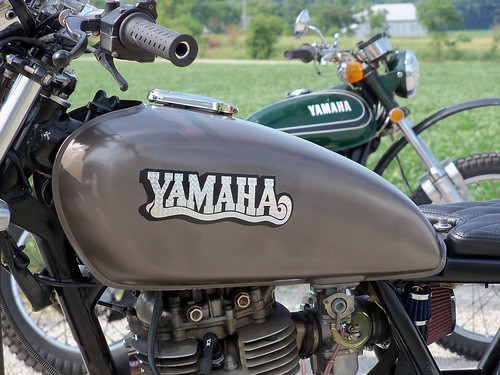
I love the color.
The original paint was cracked, and any area with a crack usually has rust underneath.
This is the area where the stock seat rubbed the paint off.
A light sand blasting and it looks mint.
Clean and ready to go. I had a couple small dings that I used body filler to fix.
It is just a low cost and simple spray can paint job, using Dupli-Color self-etching primer, Rust-Oleum "metallic dark bronze", and covered with Dupli-Color wheel clear coat. Usually not a good idea to mix brands, but I did a test on a scrap piece of metal, and no interaction problems, so went ahead with the tank.
The Dupli-Color self-etching primer applied, and dry sanded with 400 grit paper.
I did a couple coats of the bronze, wet sanded with 400 grit, applied another coat and wet sanded again. This paint went on very nicely.
The stickers in place. Looking back, here is where I goofed up somewhat. I wanted the stickers level, so should have set the tank on the bike to apply them, but didn't. The stickers are level, but the tank isn't level on the stand, so the stickers go uphill a little on the bike, but it is not a big deal. Just something I'll keep in mind next time.
The clear goes on hazy, but clears up when it dries. I did a couple coats, and it went on nice enough that I didn't do any wet sanding, but will just wax and buff it after it cures for a week or two.
The SR500 uses the same gas cap as my '79 XS650 Special, so I ordered an extra gas cap gasket for it from Mikes XS last fall when I did the work on the XS.
I'd never noticed it leaking, but it sure looked bad.
I love the color.
Subscribe to:
Posts (Atom)