4/29/12
SR
I made the tag and light mount out of 16 gauge, and gusseted the loop. I should have all but the seat pad and paint done this week.
4/28/12
the loop
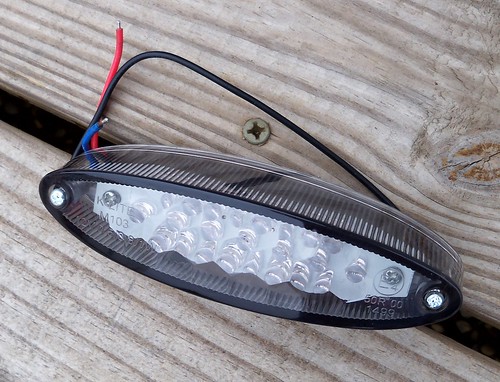
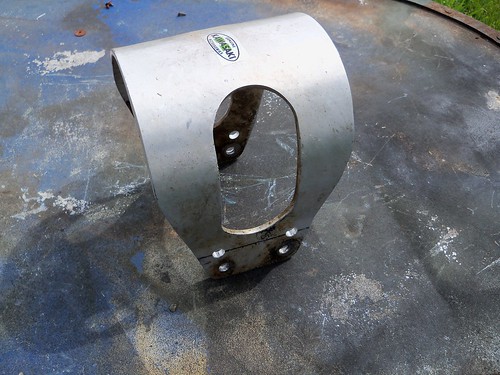
The tail light for the SR500 came in. It's a really slim LED light, and should work out good.
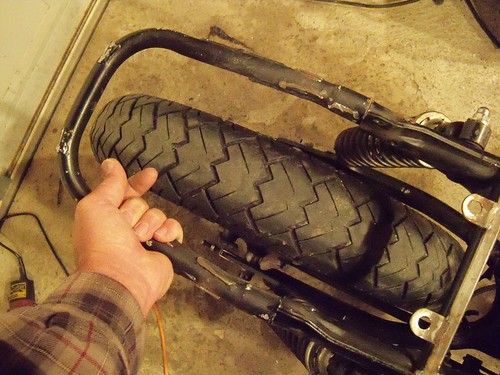
I decided the best way to mount the tag and light would be to add a frame loop, so starting with one from a wrecked KZ900 frame.

The KZ loop is a good fit with the flat track seat.

It is the same width as the SR frame, trimming both to fit here.
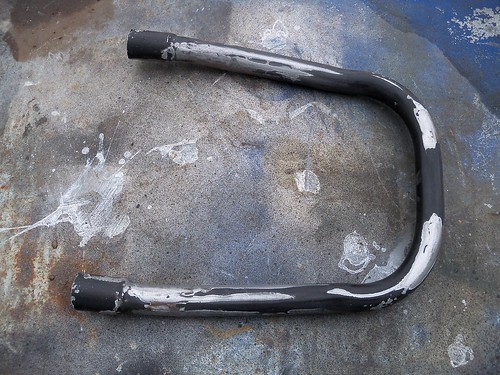
Almost cleaned up and ready.
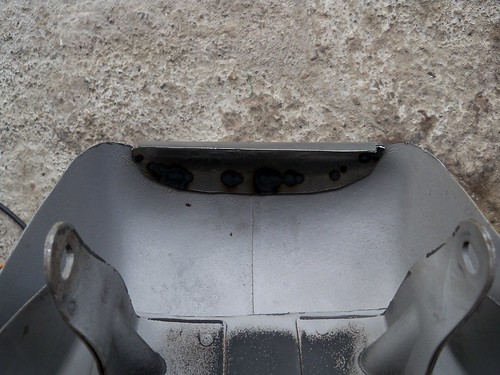
Tacked in place to test fit.
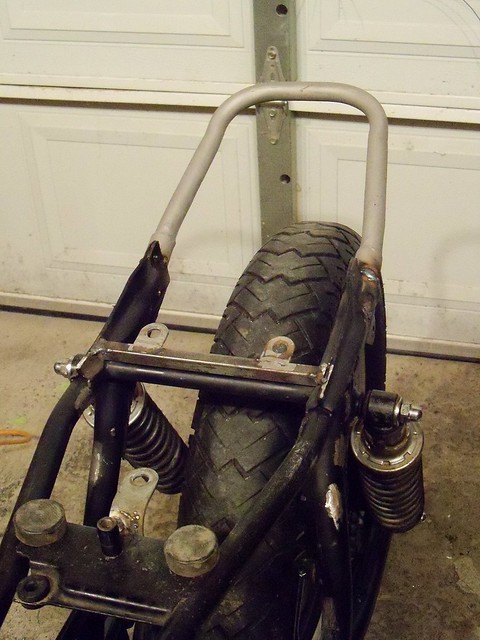
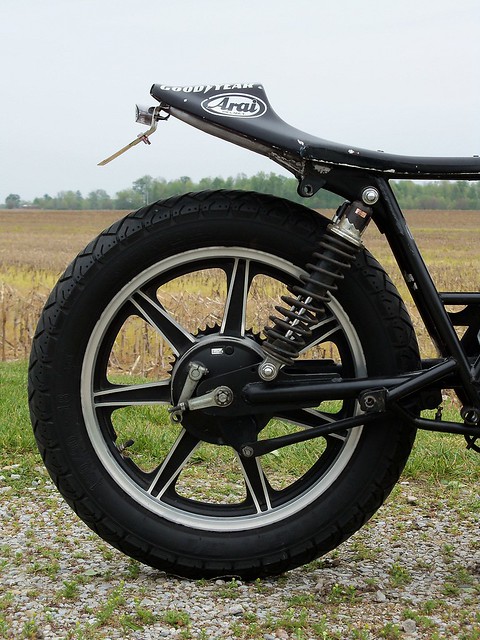
That will work. I like how it is partially exposed also. Now to do the finish welding, and some gusset work to blend with the shock mount area, and then the tag and plate mount.
I decided the best way to mount the tag and light would be to add a frame loop, so starting with one from a wrecked KZ900 frame.
The KZ loop is a good fit with the flat track seat.
It is the same width as the SR frame, trimming both to fit here.
Almost cleaned up and ready.
Tacked in place to test fit.
That will work. I like how it is partially exposed also. Now to do the finish welding, and some gusset work to blend with the shock mount area, and then the tag and plate mount.
4/26/12
SR and XS
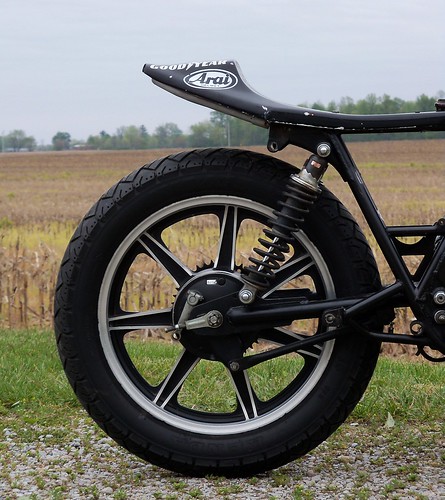
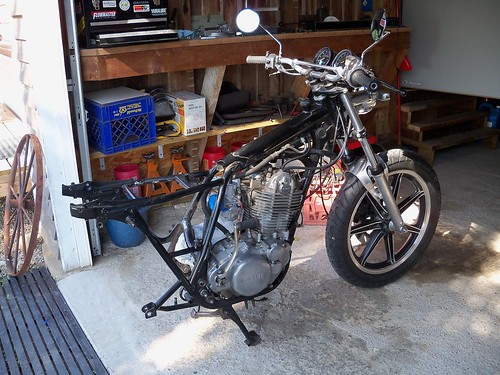
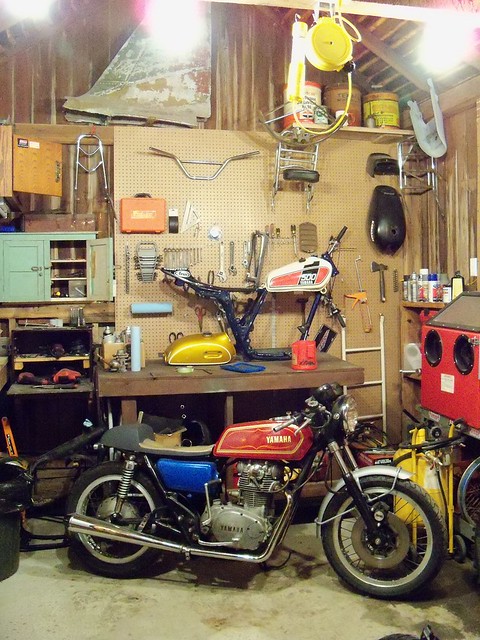
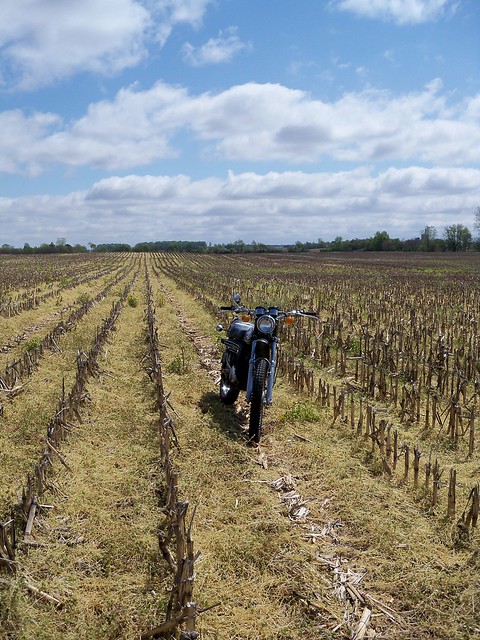
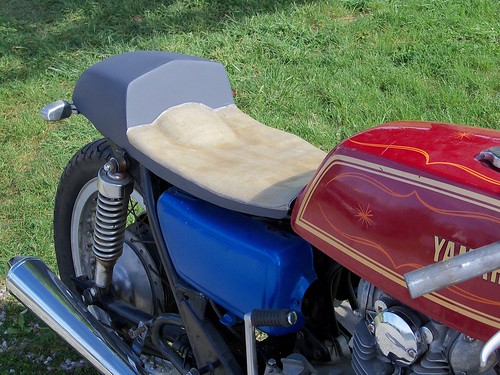
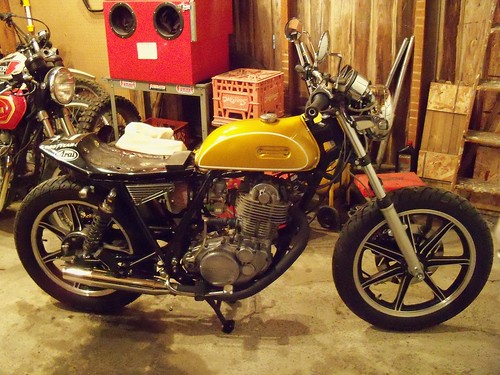
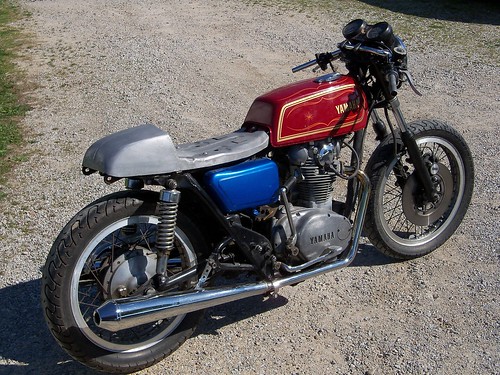
I changed my mind with the SR500. After looking at it more, I decided to use the flat track seat, but with the stock tank. So, off with the old...
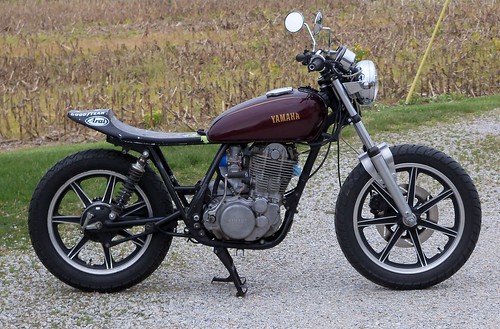
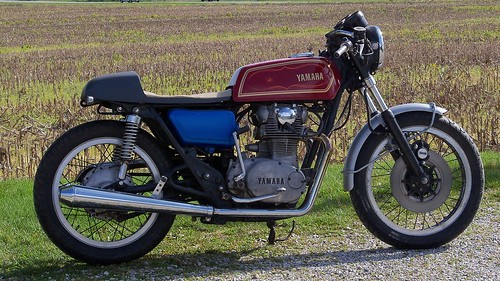
...and getting on with the new. The seat just fits better with the stock tank, and the CT-1 tank would have greatly reduced the fuel range of the bike. As soon as the new tail light gets here, I should get this knocked out pretty quickly.
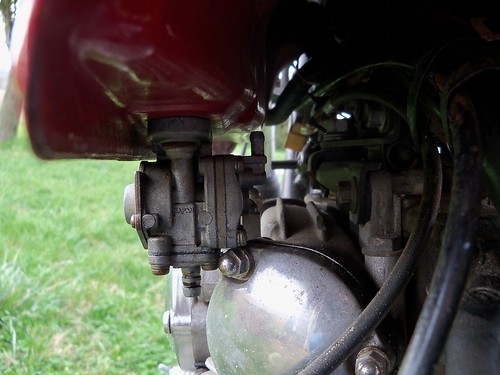
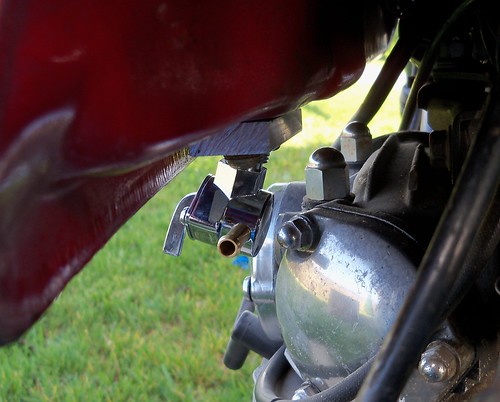
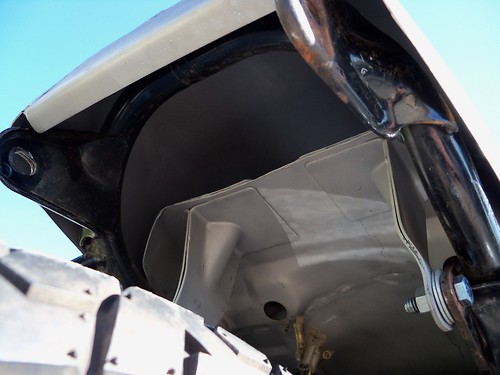
I've been working on the petcock clearance problem with the XS360 tank on the '75 XS650. It had to be removed to get the tank to sit low enough.
Many guys use a Pingel adapter plate to convert to manual petcocks on the XS650. 650motorcycles.com has a how-to, and the plates can be bought from Z1 Enterprises. In my case I needed an angled adapter, so had to make my own. I got a generic Custom Chrome 3/8" petcock and a piece of aluminum. The petcock was about $17 shipped, so a great deal if it works good, and I'm not out much if it doesn't.
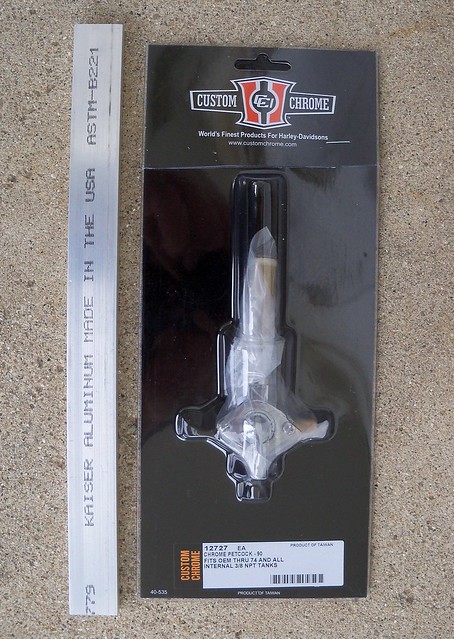
It is very compact compared to the stocker.

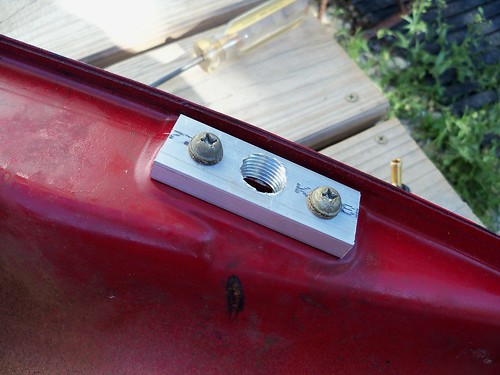
Pretty simple, just two holes for mounting, and I drilled and tapped for the petcock.
You can see where the tank opening needs opened up a bit, as described in the how-to from 650motorcycles.
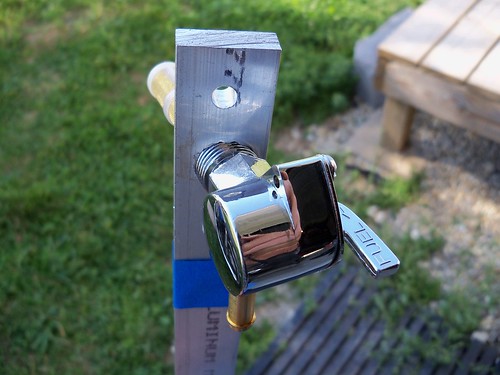
It fits.
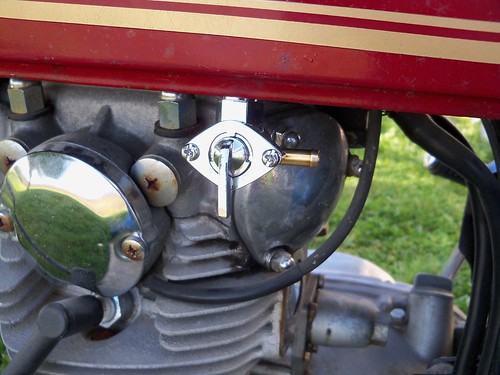
The angle gives plenty of clearance. I'll just need to cut a gasket, and round off the corners to give it a more finished look, but should be all set otherwise.
...and getting on with the new. The seat just fits better with the stock tank, and the CT-1 tank would have greatly reduced the fuel range of the bike. As soon as the new tail light gets here, I should get this knocked out pretty quickly.
I've been working on the petcock clearance problem with the XS360 tank on the '75 XS650. It had to be removed to get the tank to sit low enough.
Many guys use a Pingel adapter plate to convert to manual petcocks on the XS650. 650motorcycles.com has a how-to, and the plates can be bought from Z1 Enterprises. In my case I needed an angled adapter, so had to make my own. I got a generic Custom Chrome 3/8" petcock and a piece of aluminum. The petcock was about $17 shipped, so a great deal if it works good, and I'm not out much if it doesn't.
It is very compact compared to the stocker.
Pretty simple, just two holes for mounting, and I drilled and tapped for the petcock.
You can see where the tank opening needs opened up a bit, as described in the how-to from 650motorcycles.
It fits.
The angle gives plenty of clearance. I'll just need to cut a gasket, and round off the corners to give it a more finished look, but should be all set otherwise.
4/21/12
4/20/12
4/19/12
XS650 cafe seat part 4
I made and welded in some filler pieces for the indentations on each side just ahead of the cowl, and removed the two studs that were used for the passenger grab strap. Really not necessary, but I welded in two new studs for rubber bushings that sit on the frame to make the seat more solid and take stress off the mounts. I bodyworked it and got a coat of etching primer inside and out. Time to make a pan for the upholstery. Because of the shape of the base I decided to make the pan out of fiberglass, so picked up some woven cloth and resin at Autozone.
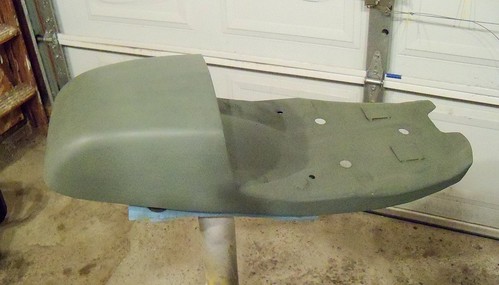
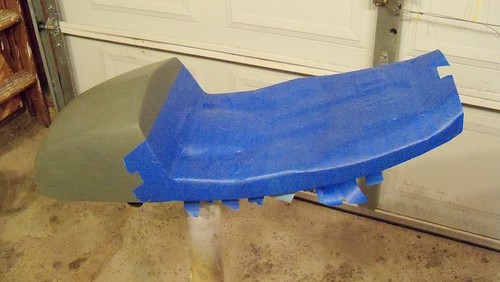
The first step is to cover the area in blue painters tape. This tape is designed to be easy to remove, and worked excellent.
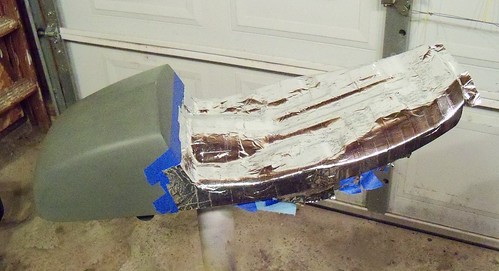
Next is aluminum furnace tape.
I pre-cut four pieces of the woven fiberglass.
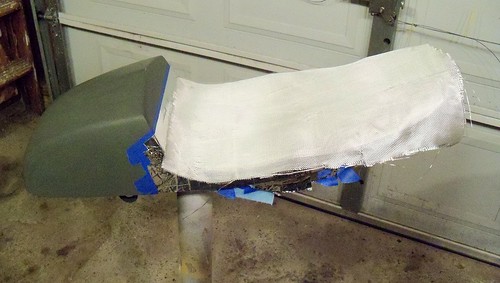
Then I waxed the aluminum tape. They sell mold release compounds, but this will do the job.
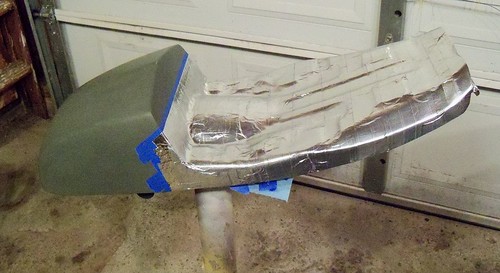
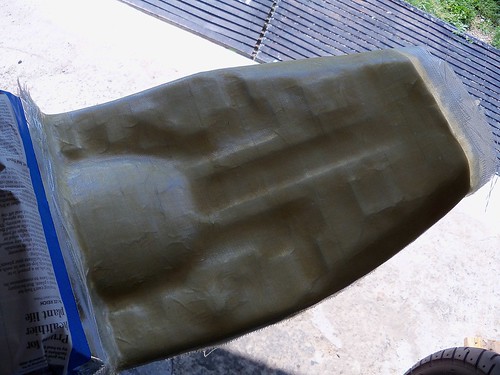
Once mixed with the hardener, the label said it would have 10-12 minutes of work time, so only mix what you think you can use in that time, and have everything ready to go. I mixed enough to do two layers. I first brushed on the resin, placed the first piece of fiberglass, then brushed resin on it, using the brush to "stomp" it down and remove air bubbles as I went, then repeat for the second layer. You want to completely saturate the fiberglass, but not use more resin than needed for that.
Here is the second batch just finished, with four layers of fiberglass total.
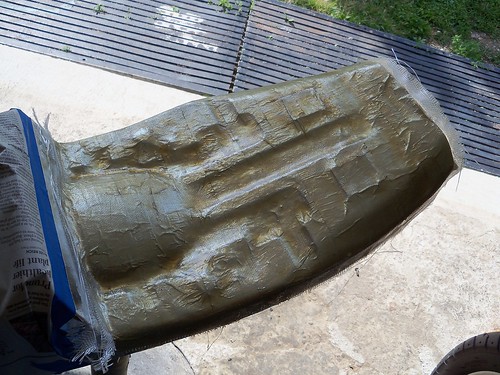
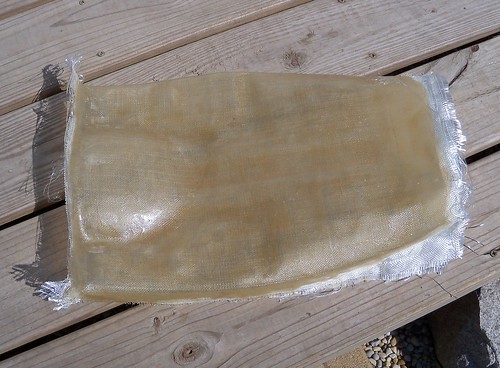
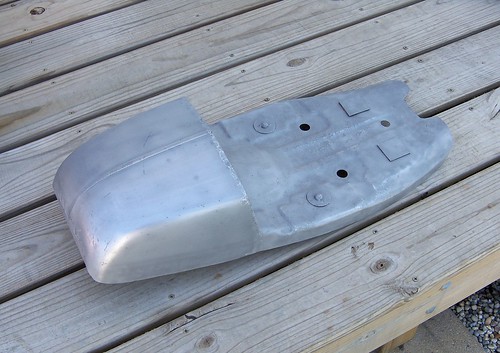
24 hours later, it is cured and ready to remove. I worked the edges and sides first, and carefully worked the rest loose.
Off, and ready to be trimmed.
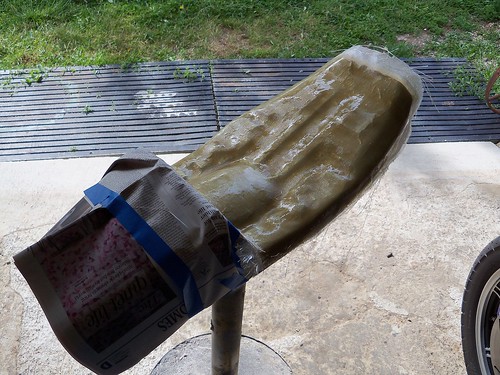
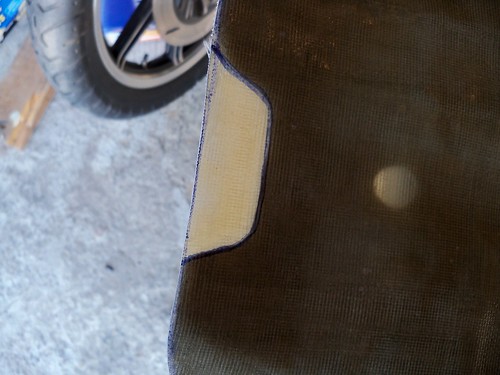
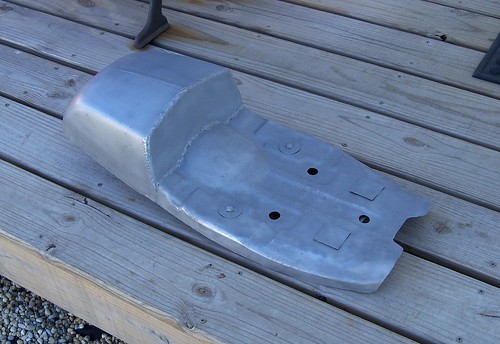
Just mark with a Sharpie and cut. I used an air cut-off wheel for most off it. This isn't the final trimming. I left extra that will be trimmed when the seat padding is done. The area next to the bum stop will end up being cut 1/8" or so later on, to allow room for the upholstery to tuck under. Basically, the pan will be trimmed slightly smaller than the padding.

More marking and trimming.
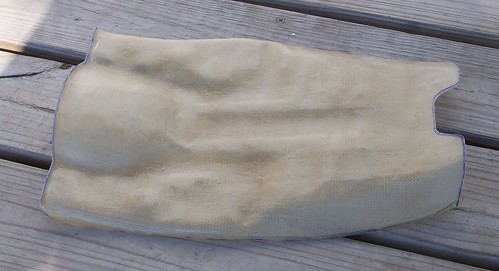
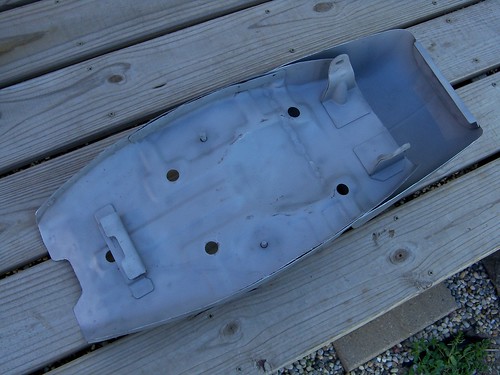
Done for now. The four layers turned out perfect, as it is plenty solid.
I also got the seat base in filler primer. The padding will be a closed cell foam, so I'll have to shape it to the pan, and figure out how I want the pan to mount to the base.
Once the foam is shaped, I need to work out the petcock clearance issue on the tank. After that it might be ready for teardown and the rebuild, as the other things don't need to be done in mock-up. I'm pretty stoked about the direction I ended up going with this bike.
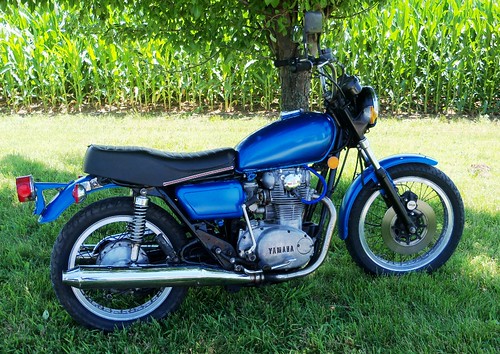
For comparison, here is the bike as I got it. It had a Special model seat on it, the cover of which I used on my '79.
The first step is to cover the area in blue painters tape. This tape is designed to be easy to remove, and worked excellent.
Next is aluminum furnace tape.
I pre-cut four pieces of the woven fiberglass.
Then I waxed the aluminum tape. They sell mold release compounds, but this will do the job.
Once mixed with the hardener, the label said it would have 10-12 minutes of work time, so only mix what you think you can use in that time, and have everything ready to go. I mixed enough to do two layers. I first brushed on the resin, placed the first piece of fiberglass, then brushed resin on it, using the brush to "stomp" it down and remove air bubbles as I went, then repeat for the second layer. You want to completely saturate the fiberglass, but not use more resin than needed for that.
Here is the second batch just finished, with four layers of fiberglass total.
24 hours later, it is cured and ready to remove. I worked the edges and sides first, and carefully worked the rest loose.
Off, and ready to be trimmed.
Just mark with a Sharpie and cut. I used an air cut-off wheel for most off it. This isn't the final trimming. I left extra that will be trimmed when the seat padding is done. The area next to the bum stop will end up being cut 1/8" or so later on, to allow room for the upholstery to tuck under. Basically, the pan will be trimmed slightly smaller than the padding.
More marking and trimming.
Done for now. The four layers turned out perfect, as it is plenty solid.
I also got the seat base in filler primer. The padding will be a closed cell foam, so I'll have to shape it to the pan, and figure out how I want the pan to mount to the base.
Once the foam is shaped, I need to work out the petcock clearance issue on the tank. After that it might be ready for teardown and the rebuild, as the other things don't need to be done in mock-up. I'm pretty stoked about the direction I ended up going with this bike.
For comparison, here is the bike as I got it. It had a Special model seat on it, the cover of which I used on my '79.
4/14/12
SR
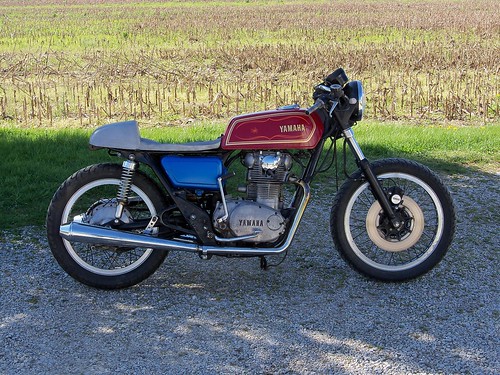
Out in the shop this morning doing the bodywork on the XS650 seat, and also trying out stuff on the SR500. I've been thinking of changing it up for awhile. I love the tank, but not 100% sold on the flat track seat.
4/8/12

4/6/12
XS650 cafe seat part 3
I welded up the cowl parts, and cleaned the rust off the pan, so getting close to being ready for the bodywork. It is coming out pretty neat for using old junk parts and scrap.
It is all made to fit around the frame. I'm not a purist and doubt I'd ever do a stock restoration on this bike, but didn't want to cut up or de-tab the frame. De-tabbing would save a couple of pounds, but just being a street bike, I'm not too concerned about it. I added a bracket for the gas tank, and three for the seat, but 10 minutes with a cut-off wheel and grinder and they were never there if I ever went back to stock.
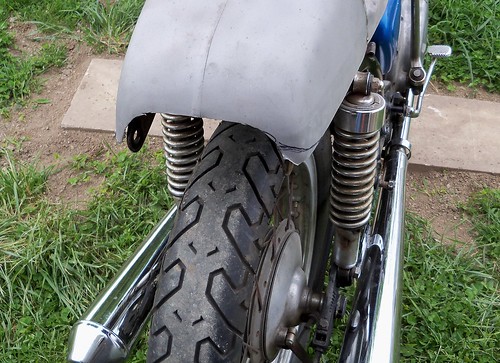
I'm really liking the look. I do like the XS750 tank most use, but I think the XS360 tank looks a little better. The tail light will probably be the standard Lucas style reproduction with aluminum body and tag mount.
Looking at the body lines, I might add a little filler piece on the front bottom of the pan on each side, to fit closer to the bottom tank line. The first plan for the seat upholstery was to have it wrap around the sides of the pan, but I'm leaning more toward a pad just on the top.
It is all made to fit around the frame. I'm not a purist and doubt I'd ever do a stock restoration on this bike, but didn't want to cut up or de-tab the frame. De-tabbing would save a couple of pounds, but just being a street bike, I'm not too concerned about it. I added a bracket for the gas tank, and three for the seat, but 10 minutes with a cut-off wheel and grinder and they were never there if I ever went back to stock.
I'm really liking the look. I do like the XS750 tank most use, but I think the XS360 tank looks a little better. The tail light will probably be the standard Lucas style reproduction with aluminum body and tag mount.
Looking at the body lines, I might add a little filler piece on the front bottom of the pan on each side, to fit closer to the bottom tank line. The first plan for the seat upholstery was to have it wrap around the sides of the pan, but I'm leaning more toward a pad just on the top.
4/5/12
XS650 cafe seat part 2
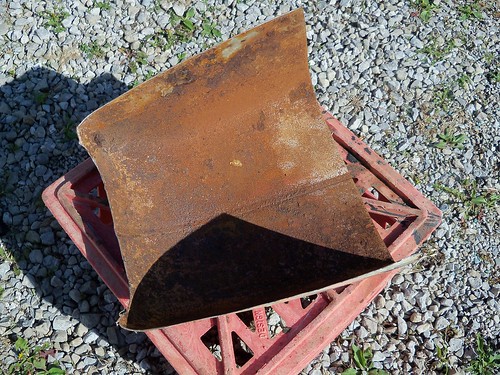
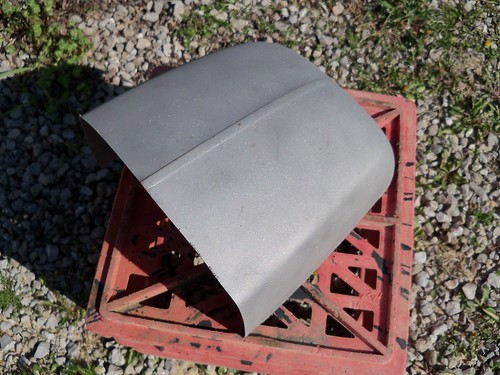
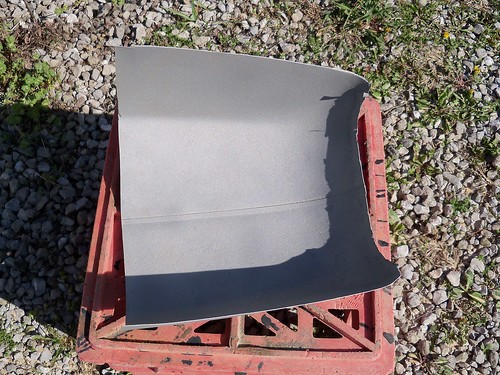
Now to get the bum stop cleaned up by sand blasting it to get rid of any rust and paint.
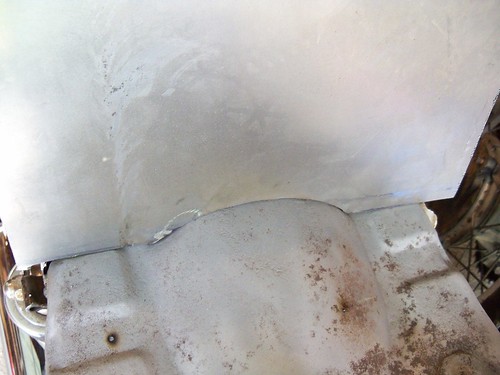
Once I figured out where I wanted it, I tacked it to the pan. I want the front to angle back, so using masking tape here to see how it will look before cutting.

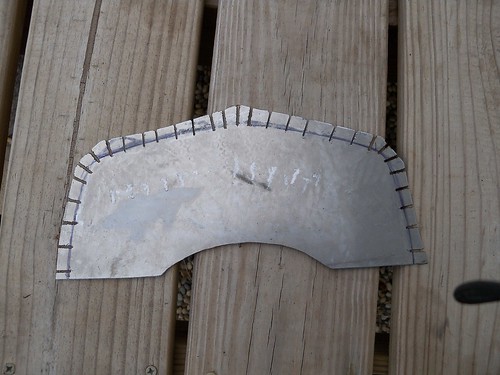
To close in the front I'm using 16 gauge steel, first fitting it to the pan here. I'm doing it almost the same way as the seat on my Sportster I did last year.
Next step is to trace an outline of the cowl on it.
Then cut outside of the line roughly 1/4 inch. This is just a rough cut, and doesn't need to be precise. And finally, cut slots slightly past the outline, making them closer together in areas where there is a curve.
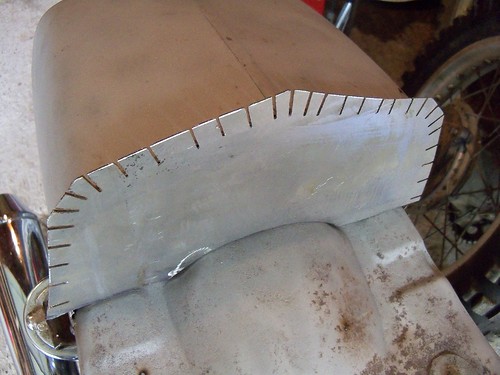
The tabs then are bent to get just the right fit.
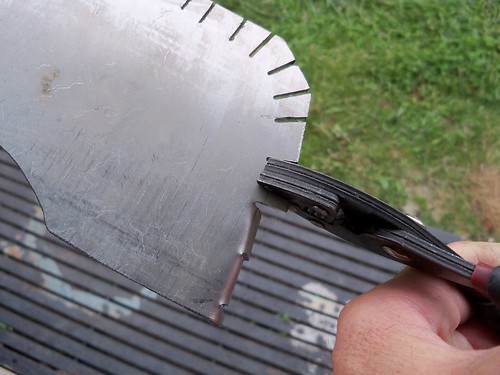
Fitting and adjusting as I go. At tight curves, the tabs need narrowed to fit.

Pretty close here, and almost ready to weld in.
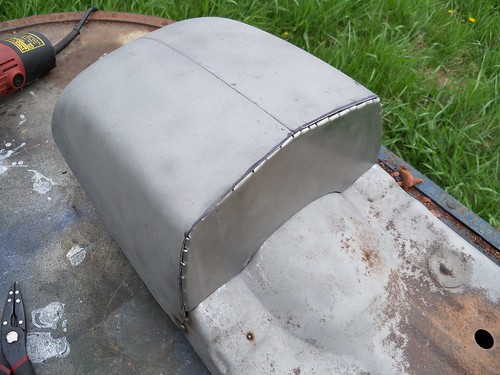
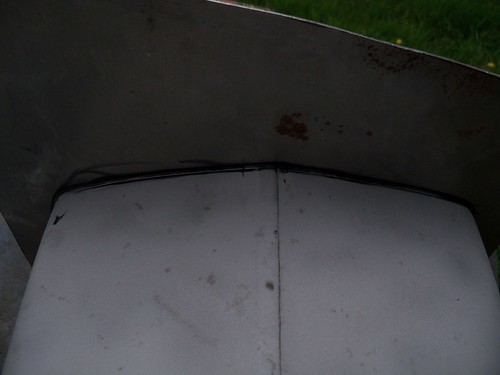
This is where the tunnel was on the CB350 tank, and needs a filler piece. The cowl will be cut to curve up at the rear, exposing the stock fender mount tabs on the rear of the frame loop, and be used to mount some small turn signals.
For the filler piece, I bent some 16 gauge, and then had to curve it. I hammered it roughly to the shape I needed, and finished off with the planishing hammer. It is a cheap one from Harbor Freight, but works great for things like this.
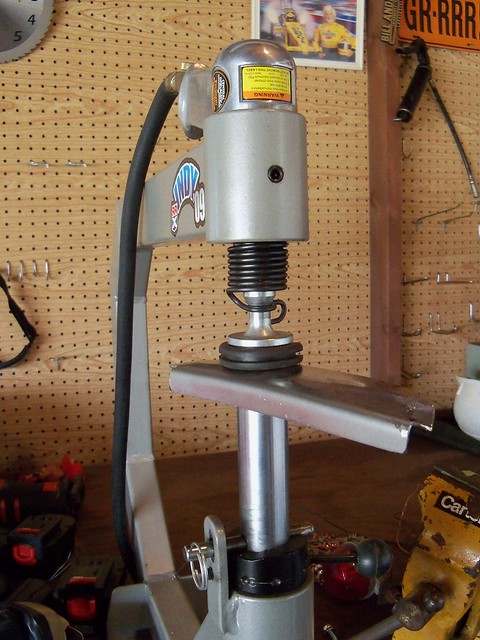
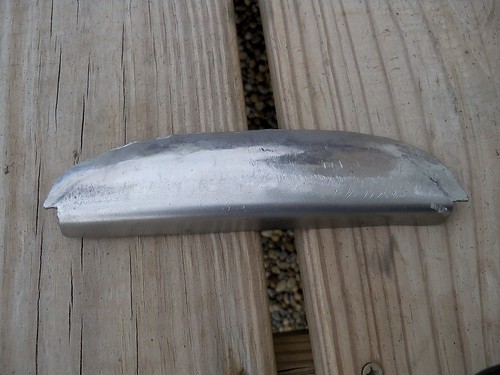
Here it is tacked in place. The reason for the bend is that I wanted more of a finished edge for that part. An unfinished edge here might be prone to damage from rocks hitting it, being right above the rear tire. I also cut the pan off behind the mounts. That part wasn't needed, and made it difficult to reach up inside to work, and later on paint.
Now to do the finish welding, and sandblasting the rest of the pan.
Once I figured out where I wanted it, I tacked it to the pan. I want the front to angle back, so using masking tape here to see how it will look before cutting.
To close in the front I'm using 16 gauge steel, first fitting it to the pan here. I'm doing it almost the same way as the seat on my Sportster I did last year.
Next step is to trace an outline of the cowl on it.
Then cut outside of the line roughly 1/4 inch. This is just a rough cut, and doesn't need to be precise. And finally, cut slots slightly past the outline, making them closer together in areas where there is a curve.
The tabs then are bent to get just the right fit.
Fitting and adjusting as I go. At tight curves, the tabs need narrowed to fit.
Pretty close here, and almost ready to weld in.
This is where the tunnel was on the CB350 tank, and needs a filler piece. The cowl will be cut to curve up at the rear, exposing the stock fender mount tabs on the rear of the frame loop, and be used to mount some small turn signals.
For the filler piece, I bent some 16 gauge, and then had to curve it. I hammered it roughly to the shape I needed, and finished off with the planishing hammer. It is a cheap one from Harbor Freight, but works great for things like this.
Here it is tacked in place. The reason for the bend is that I wanted more of a finished edge for that part. An unfinished edge here might be prone to damage from rocks hitting it, being right above the rear tire. I also cut the pan off behind the mounts. That part wasn't needed, and made it difficult to reach up inside to work, and later on paint.
Now to do the finish welding, and sandblasting the rest of the pan.
Subscribe to:
Posts (Atom)